
Introduction
Introducing the MV-1 Vaporizer by Ghost Vapes! The MV-1 was designed and built from the ground up, using medical grade materials and proprietary technology, which have resulted in something completely new and unseen in the vaporizer world.
The MV-1 offers precision temperature control, instant, on-demand, true Convection heat, dry material and concentrates, a long lasting and removable Battery Pack, a removable chamber “The Crucible,” exceptional purity and flavor, an integrated phone App and zero draw resistance, all wrapped up in a portable design, that can be taken anywhere. The Next generation in vaping is here!
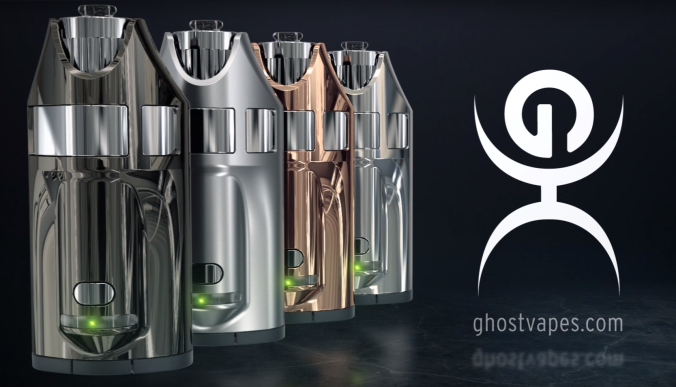
The MV-1 comes in 4 colors : Black Chrome, Satin Silver, Rose Gold, Nickel. Ghost is rumored to be working on more matte color options like the Satin Silver, which I used for this review. The MV-1 retails for $295.00.
Ghost also offers some great accessories to go with your MV-1: Spare Battery Packs $59.95, Fast Charger $59.95, Crucible Kits (x3) $19.95, Cleaning Kits $9.95, Glass Stems (x3) $24.95, A Crucible Dispenser with 5 complete Crucibles $29.95, MV-1 Case ( still being developed) and other accessories are also coming soon.
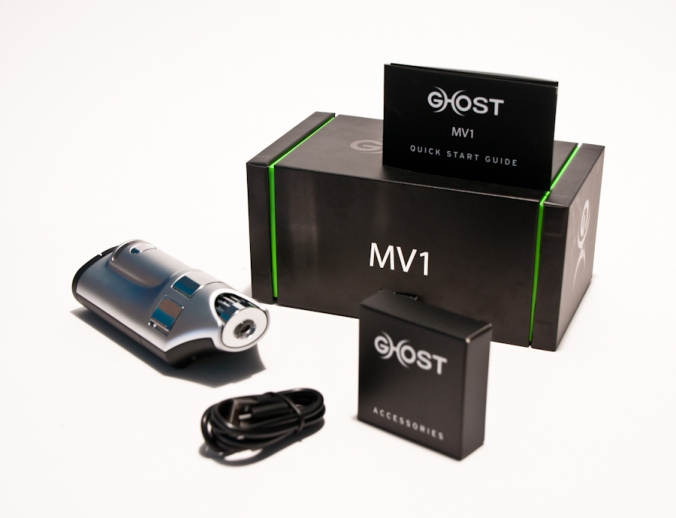
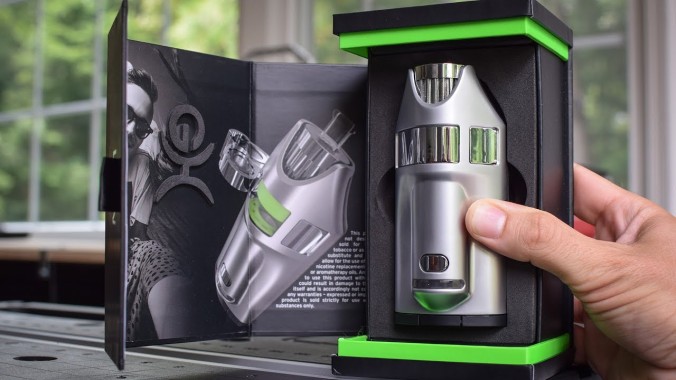
The Complete MV-1 Kit
Official Ghost Vapes Website
Vapecritic Ghost MV1 Review
Ghost MV1 Vapelife forum
Features and Specifications
- On-demand, Full Convection Heat (5 second heat up)
- Dual use: Dry Material and Concentrates
- Removable Battery Pack ( 7.2v /2600mAh). Onboard USB Charging or separate Fast Charger
- Removable ceramic Chamber “Crucible.” Capacity is approx. (.12g) recommended max
- Full temperature control ( 284F – 470F )
- 3 Pre-set temps for Dry Material: ( Low – 338F, Med – 365F, High – 390F ). 1 Pre-set for Concentrates only. 2 additional temperature settings that you can customize yourself. Phone app is required. ( 6 settings total w/ app )
- Long battery life ( 100 draws on average or 10 Crucibles )
- Metal Body and Heat Sink
- Extendable glass Mouthpiece
- Built to medical standards
- Haptic feedback ( it vibrates )
- Integrated phone App that features temperature control, device locking and much more.
Design and Overview
-Overview
The MV-1 is different, really different! There isn’t a single vaporizer currently available that I can directly compare to the MV-1, which is pretty cool, especially since we see a lot of vapes lately, promising to be different but offer nothing new. The MV-1 is unique in a lot of ways and a great deal of thought and care went into bringing this vape to life and its clear once you try it.
The Ghost MV-1’s interesting and innovative design, offers instantaneous vapor and instant satisfaction, thanks to it’s powerful on-demand full Convection heat! This is the part of the reason behind the MV-1’s incredible vapor but Ghost didn’t stop there and they understand the importance of proper vapor cooling, so they added a true Heat Sink system, that features a really amazing air intake and vapor path. So many vapes may have great and powerful heaters but if you don’t have a good system to cool the vapor back down, then you won’t be able to fully enjoy and taste it. A powerful heater and cooling system have to work together and there isn’t a better example of that in the vaporizer industry than the MV-1’s design!
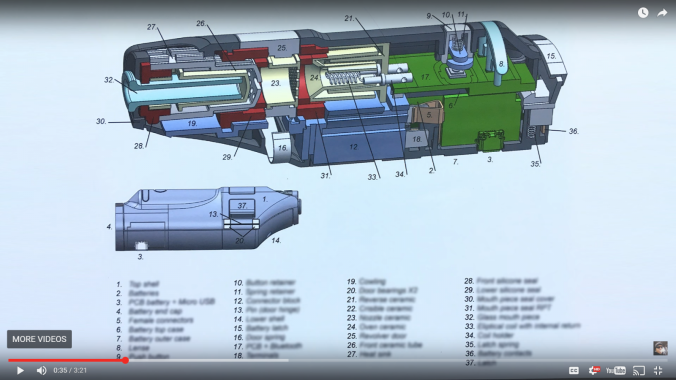
Inside the MV-1
The Ghost MV-1 is built to medical device standards, using only medical and food grade materials, so you can feel comfortable using this device, unlike some vapes that feel “toy-ish” and cheap. Built from the ground up, featuring almost 40 custom designed, tooled and manufactured components, which combine to deliver a truly revolutionary experience and exceptional purity.
It was love at first vapor with the MV-1 and its design and features are truly something special, which is why it has become my favorite portable vape! Is it perfect though? Maybe not, but its a great start from a new company and I will be very interested to see what they come up with next.
Ghost is definitely a vaporizer company to keep an eye on!
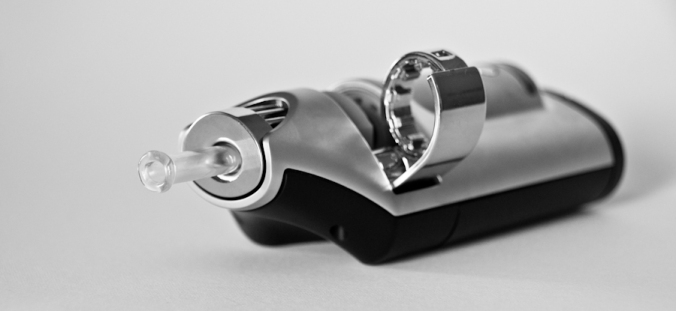
-Body
The MV-1 features a mostly metal body with a soft-touch plastic underside that has a great feel and it’s smooth, soft texture isn’t slippery or awkward. You can comfortably hold this vape in either hand and they placed the Heater Button or “Vape Button” perfectly, so your thumb sits nestled in a grove ready to engage the heater.
Overall, the MV-1 is heavy, heavier than most portable vapes and also bigger too but it’s still portable and it can still fit in your pocket or bag. The design is practical, stylish and although it’s heavier, at almost 12 oz., it’s incredibly well balanced and seems to almost disappear in your hand as your using it. It’s futuristic looking and it definitely doesn’t feel like a toy, like so many vapes out there! You will want to take care of this one!
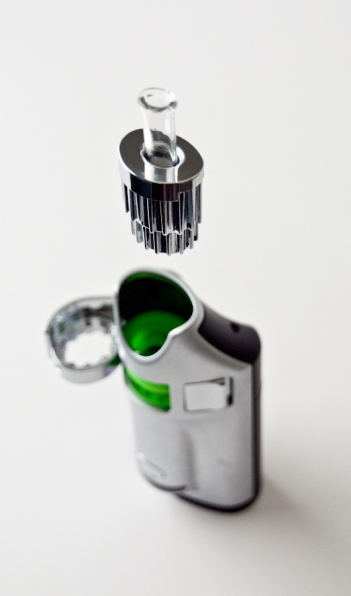
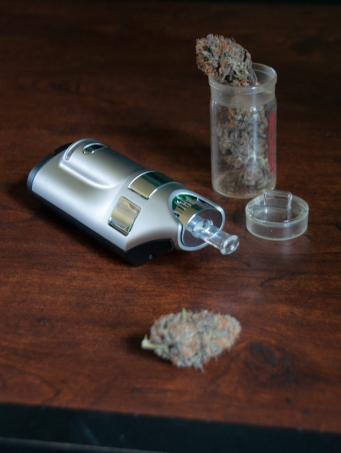
The MV-1 breaks down into 3 main sections; the Main Body, the Battery Pack and the Heat Sink / Mouthpiece.
- The Main Body houses the Heat Exchanger, the Crucible and Crucible Door, the Mode Button and Vape Button.
- The Heat Sink / Mouthpiece pulls out of the MV-1 Body and is tightly sealed and held in place by a silicone Seal within the MV-1.
- The Battery Pack slides off the underside of the MV-1 with the push of a button and easily locks back into place.
-Heater System
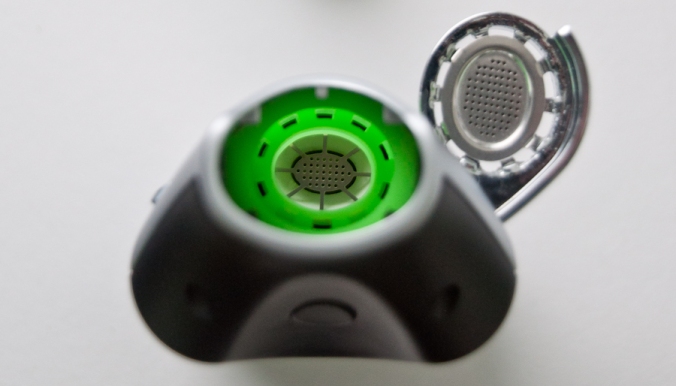
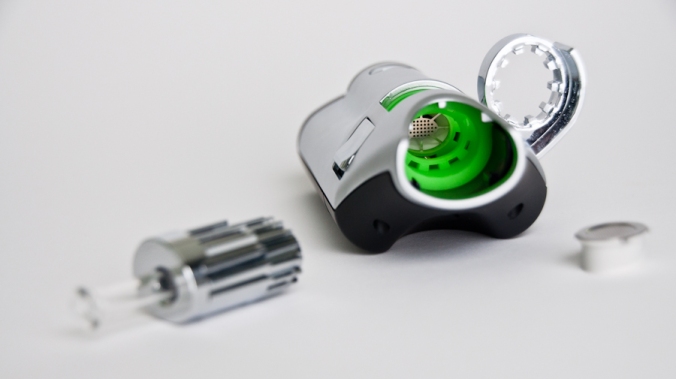
Here you can see the “Kilstock Diffuser,” a 1.5 micron laser cut wafer of stainless steel that blocks radiant heat from the coils and spreads the air flow out evenly across the base of the Crucible. You can also see the channels within the Crucible Door and the silicone Seals, where air travels into the heater
The Heater System is my favorite component of the MV-1 and the source of it’s incredible power. This is the vape that makes true Convection Heat really shine and show what its capable of! So many vaporizers claim to be Convection because it provides superior results but they are often not true Convection vapes that vaporize ingredients using only heated air and the MV-1 does just that. They’re aren’t a lot of portable Convection vaporizers available because they are harder to design, require more space and more power for larger heaters and is usually a technology reserved for desktop vaporizers for those reasons. More and more Convection vapes are becoming available because people are starting to notice the difference in vapor quality.
Here are some of the portable Convection vaporizers available today: The Grasshopper, Firewood 4, Elevape SV, Tera, MistVape, to name a few and of those portable Convection vapes, the MV-1 provides the best vapor quality and flavor. What’s the secret? The MV-1’s Heater or Element! This Heater consists of 2 long, standing Coils, made of Inconel 601, which is a high performance, Nickel-Chromium alloy, that is highly resistant to corrosion & oxidization. These 2 Coils sit below a heavy duty stainless steel wafer called the “Kilstock Diffuser,” which blocks radiant heat and spreads the heated air flow evenly across the base of the Crucible.
The Coils are housed inside a ceramic “maze” shaped chamber, that features walls designed to pre-heat the incoming air. This fresh air is drawn in and around the Heat Sink, passing across the Crucible’s sides and is eventually drawn into this maze, where the air is channeled back and fourth, until it reaches the Coils, where the air heats instantly. This Heater’s ceramic maze and air-intake path is part of the brilliance behind the MV-1 and why it’s so fast, effective, potent, pure and flavorful. As the air is moving through the maze, its being pre-heated by the ceramic  walls that have already gathered heat from the Coils inside, so when it finally does reach the glowing red hot Coils themselves, its super-heated and drawn directly into the Crucible.
Unlike other Convection based vaporizers, this device does not rely on any Conduction heat, that is added to provide a boost. These full Convection vaporizers often take a few draws to warm everything up and get the vapor flowing, so Conduction heat is added to walls of some chambers, to provide an instant hit and vapor on the first draw, like the Mighty and Crafty vaporizers but the MV-1 is so fast and efficient that it doesn’t need the Conduction and your still able to get vapor on the very first draw! I will go into further detail of how the Heat Sink also plays a roll in heating / cooling of the device in the section below (Heat Sink, Mouthpiece and Vapor Path)
The MV-1’s Heat Exchanger makes an audible noise when its heating. This noise is like a very quiet, low electronic type hum that comes on every time you hit the Vape Button and the Heater is engaged. The humming doesn’t bother me at all and it’s very quiet, some can’t even hear. The recent Firmware upgrades have also decreased this audible noise and may be mostly eliminated altogether. I’ve come across this “humm” before in other vapes like the Grasshopper, the Elo and Tera. I believe this humming sound comes from the way the high voltage electronic current is feed into these heaters and often a sign of a high quality vaporizer. I actually find the noise useful because I know the heater is engage and lets me know the coil is actually heating.
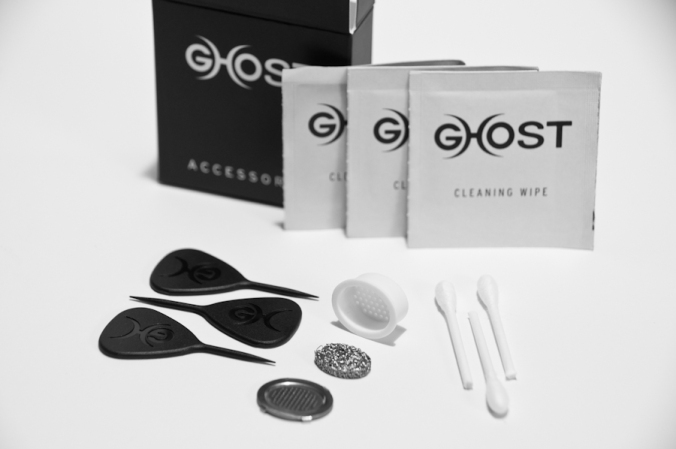
The Accessories Box that comes with every MV-1: Handy Ghost Picks, spare Crucible, Lid and Stainless Mesh Pad, 3 Cleaning Buds and Alcohol Wipes.
-Heat sink, Mouthpiece, Vapor Path
Heat-Sink and Mouthpiece
 The Heat-Sink of the MV-1 is the 2nd section that makes up this device and also houses the extendable glass Mouthpiece. This assembly is really the only part of the device that will ever have to clean besides the Crucibles, which can be soaked in Alcohol but I will cover that later. The Heat Sink breaks down into a few more parts; The outer Shell is made of cast metal (the Heat Sink), inside is a ceramic Sleeve and inside of the ceramic Sleeve, lies the glass Mouthpiece, which extends out for inhalation.
The Mouthpiece and Sleeve is held in place by a small plastic chrome Cap and rubber Gasket that clip on the end of the Heat Sink for an air tight seal and allow smooth movement of the Mouthpiece. The first version of this assembly had some noticeable “grittiness” when your extended the Mouthpiece out, as the glass rubbed along the ceramic Sleeve inside but Ghost has since re-designed these pieces, so now the Mouthpiece extends smoothly and cleanly but I still notice the occasional grit… There is also a small notch in the end of the glass Mouthpiece that “catches” on the rubber Gasket and is basically the maximum length that you should extend the Mouthpiece. I recommend having it fully extended for the easiest, free flowing draw possible but if you prefer a more restricted draw, you can push the Mouthpiece in more. It is also important to place your fingers on the top of the Heat Sink as you are extending your Mouthpiece, otherwise you may pull out the whole Heat Sink assembly from the MV-1 body as it is only held in place by a silicone Seal within the vaporizer but will also easily slide back in place if it does come out, so no big deal.
Ghost is currently re-designing the Heat Sink and I will post updates as soon as I have the new part. It features a new Gasket, Ceramic Sleeve, Mouthpiece and Shell, which eliminate the glass scratching, and also has a tighter air seal and holds better within the MV-1 Body.
Air and Vapor Path
Below is a picture of the air and vapor paths of the MV-1 and is one of the secrets behind it’s amazing vapor. In the section above, I explained how the air is pre-heated and then super heated by the ceramic walls and Coils of this vaporizer and now I will go into further detail on what happens before the air reaches the Coils and after. 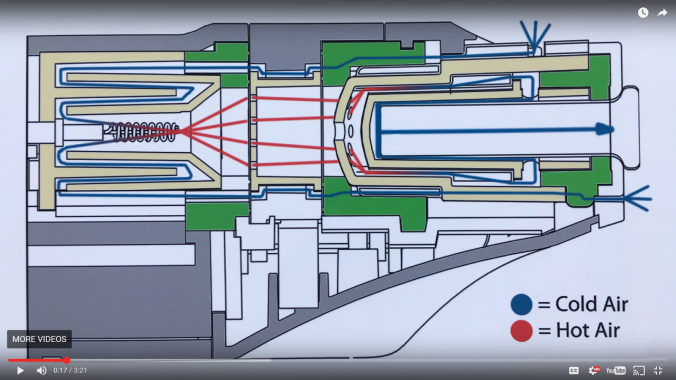
Before we get to the coils, the fresh air is drawn through and around the Heat Sink, where two things are happening simultaneously. First, this fresh air is cooling the Heat Sink by picking up heat as it passes over the already warmed Heat Sink, (after a few draws that is) which is the purpose behind a Heat Sink and cools the vape and vapor. Cool Heat Sink = cool vapor. Not only is the incoming air cooling the vape down but 2nd of all, the incoming air is also pre-heating from this process and will pre-heat even more once it reaches the ceramic walls of the coil housing that I explained earlier. Its perfect vape symbiosis!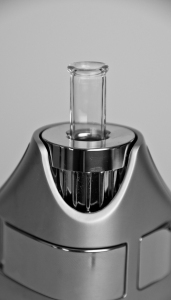
This design is the reason why the MV-1 can produce such smooth, cool and potent vapor so quickly. The folks at Ghost must be very proud of this design and its quite amazing at taking advantage of a vape that has warmed up after a few draws. The hits are always cool and comfortable. I have seen other vapes that try to recycle heat and cool, like the MV-1 but Ghost’s design is truly unique and by far the most effective attempt at this. It uses something that is normally a negative, a vape getting hotter from use and turns that into something beneficial.
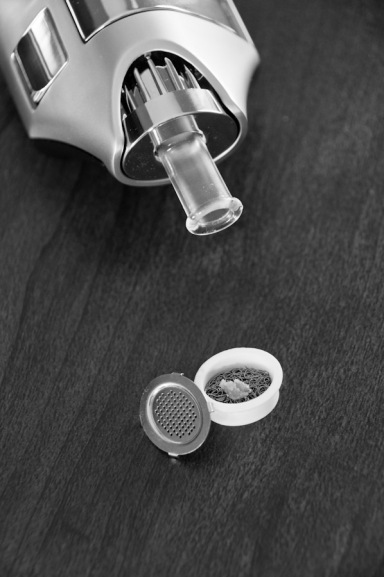
-Chamber “Crucible” and Crucible Door / Seals
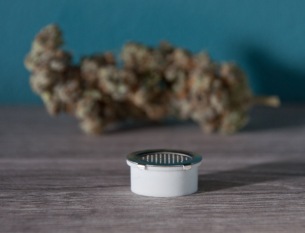
Crucible
Crucible
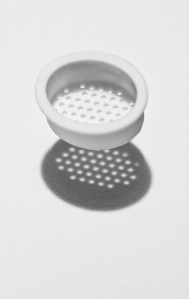
The Crucible is the removable material Chamber of the MV-1. It’s an oval shaped Chamber made out of ceramic, which has an upper edge, that holds it in the “heating path,” inside the vape Body. This Chamber has a bottom with many small holes for the hot air to enter and a thick stainless steel Lid with more small holes for the vapor to exit. The steel Lid has 4 tabs that hang down and also has an indented top that keep the Lid in place on the Crucible. This Lid does not lock in place but rather sits on top and will easily come off. I would have preferred this Lid to lock in place but once you get used to the loading process, it’s not a huge deal.
The Crucible is a good size, comparable to most Chambers and holds about .12g Dry Material or about a 1/8- 1/4 teaspoon. The Crucible’s opening is about 15mm by 11mm and 6mm deep. Ceramic is an interesting material to use for this Chamber and I would have preferred steel or glass for durability and ease of cleaning but it really does a good job and probably cools / heats faster than those other materials and its also inert.
The Crucible will stain from use and can easily be broken or chipped but I haven’t broken any of mine yet and they appear quite durable. Staining is only cosmetic and doesn’t affect vapor or taste but you can clean these Crucibles again and again by soaking them in Alcohol and they usually come out looking like new!
I would love to see a Crucible made out of Zirconia Ceramic that DaVinci IQ uses. It would be a cool Crucible and wouldn’t stain or show stains and might also be easier to clean. They would be much more durable too.
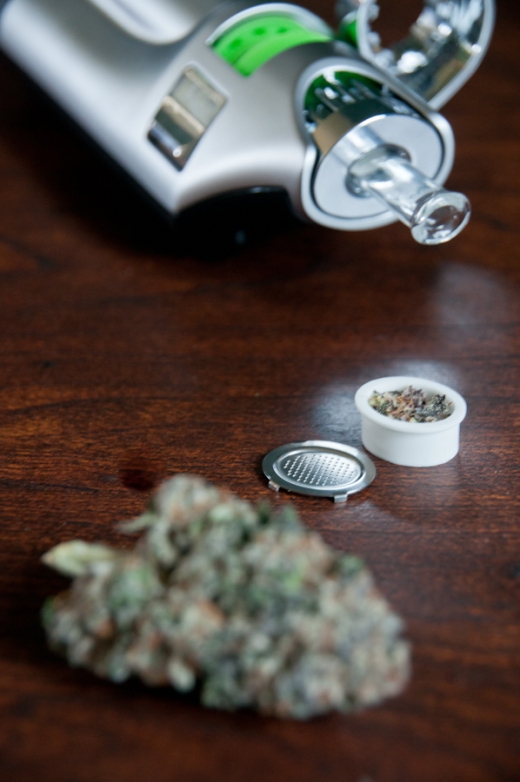
Ghost has also included a Steel Mesh pad that fits inside the Crucible for using Concentrates and works just like other Mesh pads that are featured in so many other vapes. You can also use this pad to reduce the Crucible Chamber capacity by either placing below or above your herb and works quite well and allows you to use half the material. 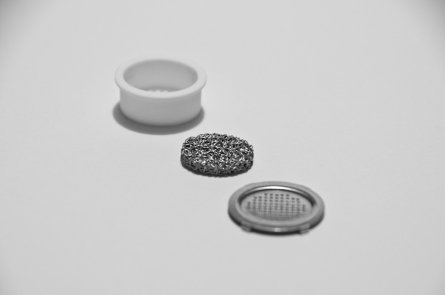
Crucible Door / Seals
Door
The Crucible sits in a cast metal Door that rotates out from the main Body of the MV-1. This Door features channels cut into the parameter, surrounding the Crucible, to allow the fresh air to pass around the Crucible, scavenging / pre-heating from the warm Crucible before entering the ceramic housing and coils below. The Crucibles loads easily enough into this Door but it takes a little dexterity to line it up and drop it into place without loosing the Lid in the process. Once the Crucible is in position, you push the Door shut but keep and eye on that LID and the Door locks shut. The Crucible is a bit loose sitting in the Door and I think a tighter fit would align it better within the Heating Path for optimal performance.
Seals
There are two green silicone Seals that create an air tight seal around this Door / mechanism and its important that the Door is fully shut, the Lid and Crucible are in proper place, and the Seals are clear for optimal performance. These Seals have the same channels or paths in them that the Door has, as the air flows through them and into the heater, so its important to inspect them from time to time. I really wish Ghost had allowed users to remove and replace these two silicone Seals because with use, they can get dirty, possibly damaged or wear out, potentially losing their seal and it would make cleaning easier but they never get that dirty with careful use. Occasionally, its a good idea to wipe these Seals down with a Q-Tip dipped in ISO Alcohol to keep them clean and check the air paths to ensure they are clear.
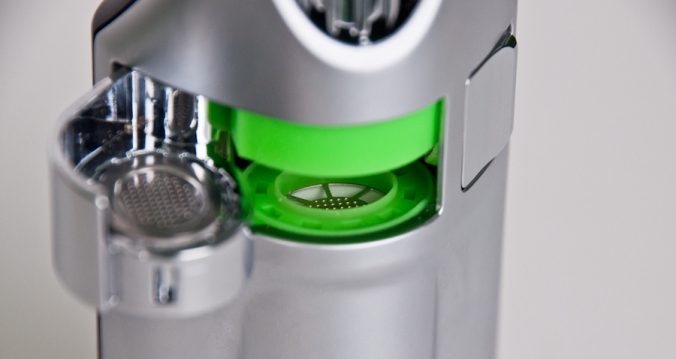
Two green Silicone Seals keep the Crucible and Door air tight within the heating path
-Controls
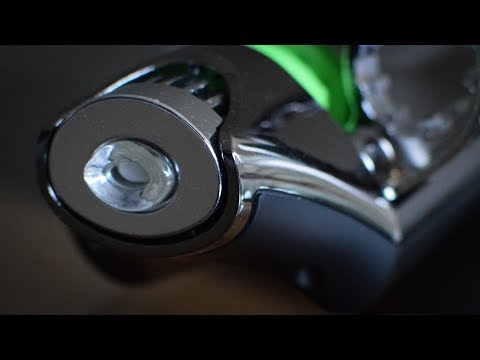
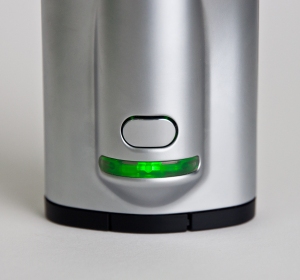 The MV-1 is simple to use and features one Button to control the vape and one Button to engage the heater. The main Button is called the “Mode Button.” The Mode Button wakes the vape up, allows you to select your temperature, as well as check the Battery Level. I found my Mode Button to be a bit “soft” feeling and sometimes its not been very responsive and often takes more clicks to wake the vape than it should but I haven’t read of others having this issue and it’s really quite fine. I recently tried a second MV-1, Black and the Mode Button is much more responsive and springy than my Satin Silver MV-1. It takes 3 clicks to “Wake” the vape up from “Sleep” or “Shipping” Mode and put it into “Vape” Mode. Once the vape is in this Mode, you can now depress the “Heat” or Vape Button to engage the heater for vaporization. I am really not a fan of the whole “3 click” on/off system that so many vapes use but it definitely keeps you from accidently turning these devices on when you don’t mean to.
To check your Battery Level at anytime, simply hold the Mode button for a few seconds and the LED will show either, 3 LEDS for full charge, 2 LEDS, 1 LED or 1 blinking LED for dead Battery. I would like to see a more precise Battery Level Indicator, maybe 6 LEDS next time but as long as you have 1 solid LED, you will most likely be able to vape a full Crucible 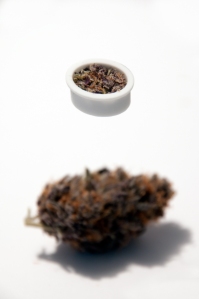 and most likely more.
To select your temperature, you must be in Vape Mode and then you hold the Mode Button for a few seconds and the LED will show the Battery Level but then you must quickly hold the Mode Button down again, to cycle through the Temperature Settings and it’s one click each, to cycle through these 6 settings of the MV-1. The navigation of the MV-1 is a bit “clunky” and I think it could have been made easier with an additional 2 buttons for up and down but really that’s minor, especially with a vape that only has 6 settings to cycle through. A digital screen would also be a great addition, maybe the MV-2…?
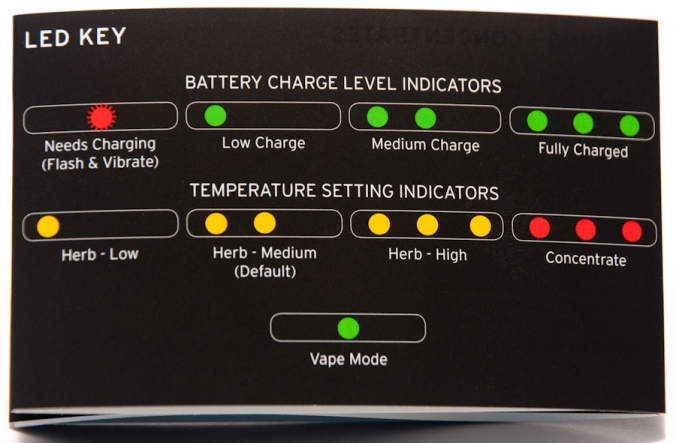
Here is the LED Key:
Battery Charge Level Indicators:
- 3 Green LED = Fully Charged Battery
- 2 Green LED = Medium Charge
- 1 Green LED = Low Charge
- 1 Flashing Green LED = Charge very soon
- 1 Flashing Red LED = Dead or needs charging
Temperature Setting Indicators:
- 1 Yellow LED = LOW Temp for Dry Material: 338F
- 2 Yellow LED = MED Temp for Dry Material: 365F
- 3 Yellow LED = HIGH Temp for Dry Material: 392F
- 1 Red LED = 1st User Customizable Temp from ( 284F – 428F )
- 2 Red LED = 2nd User Customizable Temp from ( 284F – 428F )
- 3 Red LED = Concentrate Mode ( only use this setting for Concentrates! )
-Battery
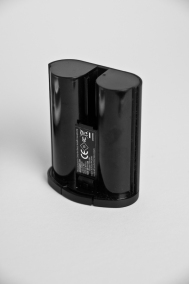
The MV-1 Battery Pack: 7.2v /2600mAh
The MV-1 features a removable Li-ion Battery Pack ( 2600 mAh ), which can be charged via USB ( slow charge ) or with their Fast Charger ( sold separately $59.95 ). The Battery Pack neatly slides onto the MV-1 and Clicks into place. You can leave the Battery on the device and charge through the USB or take it off and charge it with the Fast Charger or USB. Unfortunatly, there is no pass through charging, so you cannot use the device while its plugged in. The Battery Pack features a small LED above the USB port that is Red while charging and turns Greenish/Yellow when its full. I highly recommend getting a spare Battery Pack for the MV-1, so your never without power, although the Battery Life is quite good and I also HIGHLY recommend the Fast Charger because its much faster than charging via USB. I will cover Battery Life in the Vaporization / Usage section below. Remember to charge your MV-1 Battery overnight for the very first, initial charge, to condition the Battery and give it the best possible life.
-Phone App
Th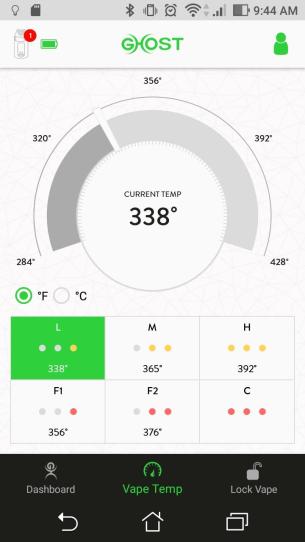 e Ghost MV-1 also features an optional phone App (available for Android and Apple ) that can be used on most smart phones and allows you to check Battery Life, cycle through the Temperature Settings, update the Firmware of the MV-1, shop for Accessories, view the Manual and even lock your vape! This App is not required to use the vape but if you want to access and use the 2 Custom Heat settings, you need the app. I think Ghost should have pre-set these 2 custom temps, so people who don’t use the App can still have access to them, giving them more temperature options because 3 temperature settings is really not enough for most users. I wish these Apps could also be used on a computer, either wireless or wired, to give the user more options, especially those who may not have a smart phone.
I don’t typically like Apps with my vapes but this one is actually nice and I found it to be quite useful. I have really enjoyed using the App and its a great way to instantly change the Temperature Settings during a session and its also very easy to use, its cleanly designed, looks good, and it’s effective and practical.
Once you pair your MV-1 to the App, you will be asked to name your vape and from that point on, your MV-1 will automatically pair and sync. to the App as long as your vape is Vape mode or Sleep mode. Occasionally, you may need to re-pair your MV-1 and connect to the App but it’s usually not a problem and does it automatically. Sometimes I’ll re-start my phone if I am unable to pair and that usually does the trick. Changing Batteries can also disconnect the vape from the App and you’ll need to re-pair and this is usually the only time I have issues now, with the latest Firmware Update ( v1.3.4 ) but restarting my phone is all it takes if I can’t pair immediately.
Updating the Firmware on your MV-1 is important and I have noticed a variety of changes since the first version, compared to the latest and the MV-1 experience has improved with each update. The updates can affect temperatures, battery life, heating algorithms, etc. and even lower the sound of the electronic hum from the heater. Most MV-1’s should have the latest Firmware but in case yours doesn’t or you would like to check, go to the app and click the MV-1 “My Vapes” in the top left hand corner of the screen. Once your there, it will list your current version, just below the battery indicator. If you need to update or reset the Firmware, click the 3 vertical dots, just below the version. Next, go to “More Details” and either click “Firmware Update” or “Firmware Reset”. Your MV-1 will now reset or update and you’ll see a large progress circle, showing the current process percent and at the end you will just re-pair your MV-1 to the App.
I’ve had quite a few problems in the past updating my Firmware and connecting but with every Firmware Update, my App and MV-1 have been getting along better and better. I’m not a huge smart phone user but I’ve also had issues connecting my Crafty Vaporizer to its App and it just won’t do it on my new phone, so occasionally things aren’t compatible.
App Sections / Navigation
There are basically 3 sections of the App and its easy to navigate and use. The main screen is called the Dashboard, which shows the Battery Life and easily allows you to choose any of the 6 temperature settings on the fly and also allows you to shop for accessories and Lock your vape.
 Vape Temp is the second section and shows all of the 6 Temperature Settings and allows you to select / set your custom 2 settings ( F1 and F2 ) anywhere from 284F – 428F, in 1 degree increments. The Temperature Dial for selecting the temperature is a bit hard to select exact temperatures and I wish it featured an area where you can type in your temperature. The Temperature Dial looks cool and is very clean. I hope future versions of the App will allow for further control of your device and feature Temperature Settings that can increase in temperature during your draw, like the “Smart Paths” from the DaVinci IQ Vaporizer.
The third section of the App shows your vaporizer, the name of your vape, its status ( connected or disconnected ), the Battery Level %, the Version of the App and another information area, where you can view the Manual and More Details, like Device Information and Firmware Updates / Reset. Firmware updates are important and can have a great affect on the performance of the MV-1, so its a good idea to update your vape if they are available and if you are able to. If you order an MV-1, it should come with the latest Firmware, so you will be good to go, until they release another Update.
-Accessories
 Ghost has a number of great accessories to go with your MV-1 like; Cleaning Kits, Glass Stem Packs, Spare Crucibles, spare Batteries, a Crucible Dispenser and an upcoming MV-1 Case. I Highly recommend the Crucible Dispenser ($29.95), which comes with 5 Crucibles / Lids and holds 5 loaded Crucibles for fast reloading and added convenience on the go. The Dispenser is not air tight but its built very well and does a great job keeping your MV-1 fully loaded and its quite compact as well. Spare Batteries are very helpful and its so easy to have one charged and ready, so your never without power and the Fast Charger is the best way to charge your Batteries. At the very least, I recommend the Extra Crucible Pack ( $19.95 ) and comes with 3 Crucibles, 3 Lids and 3 Concentrate Pads because you will want to have spares around!
Ghost has also mentioned that they are already working on more accessories and products to come! MV-X….! ? ! I will update this review with any new products from Ghost
The perfect trio and everything you need for a great session: MV-1, Crucible Dispenser and GMO Cookies!
Vaporization
-Operation / Usage
I love loading and using my MV-1! Some people love a vape with a removable Chamber like the MV-1, like myself or they prefer a vape that you can just load directly into the vape. They both have advantages and disadvantages but overall, I found removable Chambers are more convenient for on-the-go use and also keep the vape much cleaner, for longer too. Removable Chambers often have small parts and can be more difficult and take longer to load vs. built in chambers. Sausage fingers may have minor issues with loading and unloading but I think anyone can do it.
 Loading the Crucible with dry material is probably the most crucial part of the Vaporization process. The MV-1’s full Convection Heat, requires a loosely loaded Crucible, so hot air can easily and evenly travel through it. Pack it too tight and the hot air will be forced to take “paths” through the material, creating “hot spots” and uneven heat.
I recommend filling the Crucible to the top of the rim, or below but not above! Slightly less material, often equals easier vapor and better extractions, depending on your material. The Lid should sit on top of the Crucible and just touch the material beneath but not apply any pressure. You can experiment with this and certain material requires the Crucible to be packed slightly tighter and some material should be left fluffier. I think its easier to get away with more material if its fully dry and less if its “fresher.” Sometimes I get better vapor when I pack the Crucible slightly fuller and the Lid does apply slight 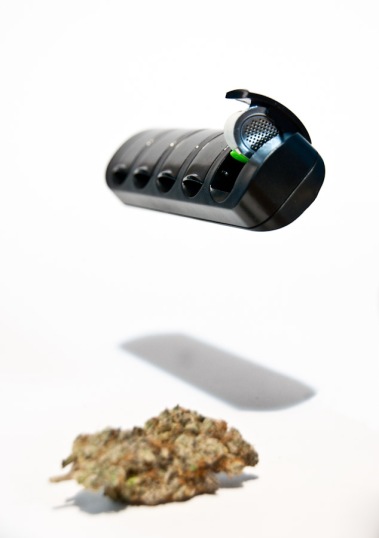 pressure and packs the material a bit. You can also use smaller amounts of material and you can still get great vapor thanks to the Convection heat. Start with less material and begin to play around with amounts and grinds to dial in the MV-1 to the needs of your specific material.
Grind that material medium fine. More surface area is better for Convection vapes but you don’t want it too fine. If your material is too fine, it can fall through the holes of the Crucible and into the Heater but you want it fine enough to evenly cover the Crucible and fill all voids. I use a Plenty Fine Screen in the bottom of my Crucibles that I cut to fit and it sits tightly in place. This screen keeps debris from falling into my Heater and allows me to use a finer grind if I choose. I have not noticed any decreased performance or decreased taste using these screens and they do a great job keeping my vape looking like new.
I like to use the “tap and shake” method to help settle the material in the Crucible, ensuring even coverage. Typically, I overfill my Crucibles, so they are mounded over slightly and I gently tap the Crucible on my table or tap it with a brush, finger or something and the excess material falls away, bits settle and fill the nooks, which leaves a fluffy but evenly filled Crucible, ready for Lidding.
The Crucibles are great for on the go use and you can easily have another ready to pop in and vape. This is part of the reason why I love removable Chambers like the Crucible, it makes use on the go, easy and fast. However, I can definitely see that loading these Crucibles with dry material and into the device itself, could be somewhat difficult for people with dexterity issues or really large hands. A little practice is all it takes and once you load / unload a Crucible into the MV-1 a few times, its really quite easy and quick but there are some tricks;
I like to pinch my Crucibles on top and bottom with my thumb and finger and then push / drop it into the Door with my finger once its lined up. Lining them up, while keeping the Lid in place is the only b
MMM Silver and Purple!
ugger. Then to pop them out with one hand, simply hold the device in your in one hand and extend your thumb up through the bottom of the open door to push the Crucible up enough to grab it your handy, other hand standing by.
The Door tightly seals against the green silicone top and bottom of the Heating Path and its important to keep an eye on the Crucible Lid as you shut the Door. Make sure it’s still aligned and tightly sealed against the Crucible rim! Making sure this Lid is in its proper position inside the Heating Path is crucial to vapor production! I always check my Lids and the Crucible’s rim, to make sure there is no debris that will keep the Lid from nestling into place.
Now your loaded, so all that’s left is to turn the vape on, select your temp and extend the Mouthpiece to your preferred height. I extend my Mouthpiece fully, for the least draw resistance and maximum vapor. If you prefer a tighter draw or want less vapor, push the Mouthpiece in a bit and it can drastically change the draw and vapor production. Place your fingers on the top of the Heat Sink as you extend the Mouthpiece or you may end up pulling the whole assembly out.
The Session
I tend to start my sessions on Low, 338F and bump it up as I take a few draws in for increased extraction and vapor. Sometimes I’ll go even lower and set one of my Custom Settings to 315F or so, to get an even fresher, cleaner taste to begin with but usually not much visible vapor. The App is the best and easiest way to change the temps on the fly and ensures your not missing any of those “secret ingredients,” that may vaporize at different temperatures. I also vape on Low when I have a full Battery or freshly charged Battery because it seems to heat quicker and is a little hotter vs. a drained Battery. I typically use the Mid temperature ( 365F ) the most and I usually get good vapor at any Battery Charge Level, no matter the material I am using. I also may adjust the temperature, grind, pack and draw depending on if my material is dry, fresher, fluffier or denser etc. I suggest starting Low and then increase to get the vapor your looking for. A rule of thumb with the MV-1 or any vape really; start Low with a drier material and use higher temps to start when material contains more moisture. The drier your material, the easier and more effective your vaporizer will be.
View inside the MV-1
Next, I draw once temperature is reached, once it vibrates. I take fast, long, steady draws with the MV-1, typically faster than most vapes. I’ll vary my draw too, sometimes I draw faster, slower, longer or shorter depending on the temperature and material I am using. I usually don’t draw for more than 10 seconds and I usually disengage the Heater about 6-8 seconds into my draw and continue to draw a few seconds after, to get the residual heat, all the vapor and cool that Crucible / Material back down. I don’t think I’ve ever drawn so long that I’ve reached the cut-off time for the Heater, which is 15 seconds I believe and found that its not necessary to draw that long, unless you are using Concentrates. If your not getting the vapor you desire, either try drawing faster and / or longer for more vapor or slower / shorter for less vapor before you adjust the temperature. You draw greatly affects the vapor production with the MV-1 and you can also adjust the Mouthpiece like I mentioned earlier.
The MV-1 relies solely on hot air from your draw to heat your material, so occasionally I’ll open up the Crucible after 5 or more draws and give it a quick look and stir, then vape it another 5 or more draws and that’s usually enough to fully vape your material, approximately 10-20 draws. Depending on your material, grind, load, temp and even your draw, you will have more or less even heating. If you pack properly and loosely, the
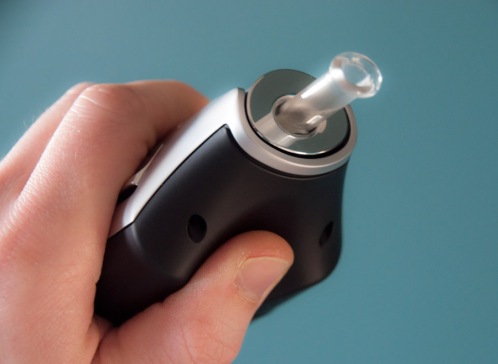
Ergonomic design that fits either hand
MV-1 produces very nice, even heat and you don’t typically have to stir at all but other times your material may be fresher nearest the edge of the Crucible and more vaped towards the center, so a stir is helpful. There is no Conduction Heat with the MV-1, like other vaporizers ( Crafty, Mighty, Alternate, ArGo, BNDLS Tera, CFX, CF, CFC, Plenty, etc. ) that also have heated Chamber walls, which add to the Convection Heat, helping to ensure everything is fully heated throughout, edge to center and that you get vapor from the first draw. This is why your material may be less heated or vaporized nearest the edge of the Crucible and more vaped towards the center. This is one of the few drawbacks to full Convection Heat but with proper packing and understanding, you can great, even heat and complete extraction with your MV-1, using any material of your choice and usually without stirring.
I typically unload the material immediately after a session, while the vape is still warm. I take a few “cool” draws, without heat to cool the Crucible before I open the door or I will blow on the Crucible for a second or two, with the Door open and that’s all it takes to cool it enough to handle. If your quick, dump and brush the Crucible / Lids while they are warm, you will have an easier job and it will keep them cleaner for longer. It is very important to keep the Lid holes clear and clog free in order to have the best air flow / performance and they usually stay clean for quite a while with a quick dry brush between loads.
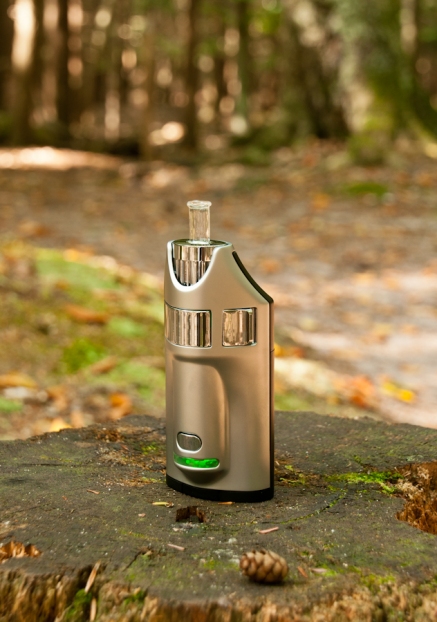
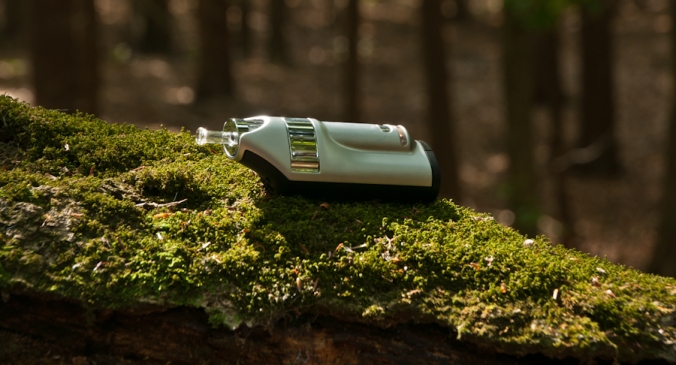
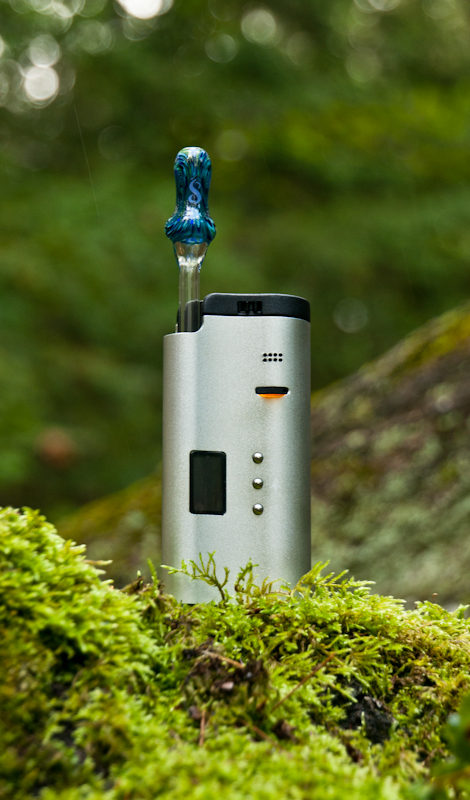
MV-1 in the wild
The Battery life of the MV-1 is quite good and get an average of 10 Crucibles per charge or 100 draws. This will vary, depending on a variety of factors like; temperature selection, Firmware Version, how long you engage the heater and outside temperature. I always have my other battery charged, so I am never without my MV-1, which I use daily. The Battery indicator is fairly accurate but I wish it was more precise. Your always good if you have 2 LEDS or more and you can usually still get a couple Crucibles when your down to 1 LED or even 1 Blinking LED. The app shows your Battery level too and does a slightly better job giving you a more accurate reading. You may notice a decreased in performance or vapor production when the Battery is running low but you can always get vapor and sometimes it requires bumping up the temperature. I would like to see more consistent temperatures, no matter how charged the Battery is but its seems fairly true to the temperature your on and may just take longer to reach that temperature. You should have the same temperature / vapor on 365F, on a Full Battery and a Low Battery but its not always the case and I hope further Firmware Updates will improve this consistency more and the previous updates have already improved the temperatures. I’ve read of some people taking off their Battery and popping it back on, when the Battery Level has dropped and this changes the voltage or the way the Battery works, so they get more vapor for some reason. Ghost recommends to keep the Battery connected throughout the Battery Level and instead bump the temperature up a little if your not getting the vapor you desire.
-Vapor Quality / Production
Dry Herb
As I have mentioned, the vapor quality and production can vary greatly depending on your specific material, the techniques you use to load each Crucible and how you draw on the MV-1. Some material produces huge clouds easily, while others may not and require a different temp, less material, different grind or different draw technique etc., so sometimes you need to play around to get the vapor flowing. You will quickly realize what works best for you and your material, if you are willing to work at it a little. With that said, the MV-1 quite possibly produces the best tasting, smoothest and most potent vapor, draw for draw than any other portable vaporizer I have tried, including the famous Mighty. Vapes at or near this level in taste and vapor quality include: Arizer ArGo, Firewood 4, Grasshopper, Tera, DaVinci IQ. Mighty/ Crafty, Plenty, Elevape (sometimes) and MiniVap. I’m sure there are others but these are the vapes I have experience using and have exceptional taste and vapor. I am always amazed when I blow out a huge cloud from this device because you barley know your getting a hit, it’s that smooth and cool, even at higher temps or long rips and with Concentrates and Extracts too. You’ll definitely feel a kick in your lungs from the potency, not from harshness and the exhale is just as smooth and comfortable. If you have tried other vaporizers before that were harsh and made you cough, you should try the MV-1 because it’s truly a different experience. I have used plenty of vapes and most in fact, can produce vapor that is hot and uncomfortable, especially near the end of the session, when the Material is more spent and the heat has built up, so the vapor is naturally less smooth and flavorful but the MV-1 seems smooth and flavorful from start to finish, no matter the temp.
The Crucible Door open
The vapor is always pure and I never taste or smell anything but my material. Food grade silicone seals the top and bottom of the Crucible and the hot air / vapor does pass through this silicone, indirectly, so you never taste any silicone. I’ve tired plenty of vapes that tasted and smelled so bad, like silicone, plastic and electronics, that it wasn’t worth using and completely ruined the flavor of the material being vaped. This is not the case with the Ghost MV-1 and it draws in fresh air from the outside, sealed off from electronics and contains food and medical grade components, that seem odor free and the silicone parts are mostly out of direct heat anyways. Some people may be more sensitive to silicone and could possibly taste it but it appears to be high quality and I cannot taste it.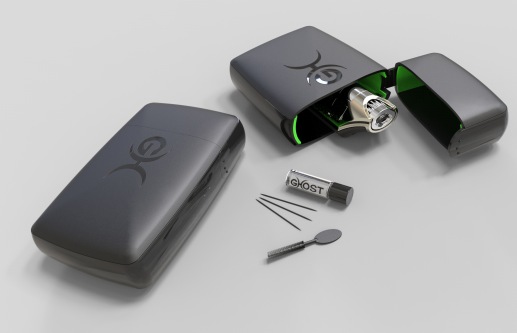
To produce smooth and flavorful vapor, not only do you need a good pure Heat Exchanger like the MV-1’s Coils but you also need a good way to cool the vapor and the MV-1’s Heat Sink does just that. Similar to why the Mighty and Crafty are so enjoyable, is in part, thanks to their Cooling Tops that make the vapor cool enough to fully enjoy all the flavors your material offers and the MV1’s Heat Sink works the same but the flavor tastes better and for longer than the Mighty and Crafty. Heat is not always on with the MV-1, cooking the material and the pure Convection Heat does a better job pulling those flavors out in all their glory.
Even though I believe the MV1 has better vapor and better flavor than the Mighty, it can be harder to achieve the same amount of vapor as the Mighty. The Mighty can produce more vapor than the MV-1 but I believe the MV-1 delivers more potent hits, draw for draw and actually requires less to achieve the same effect and its easier to achieve your desired level without going overboard. They are totally different beasts and if you have to choose one or the other, get the Mighty if you want easy, thick, full, dense clouds with short draws, less effort and get the MV-1 if you prefer a longer draw, more flavor for longer, smooth, cool but potent hits that pack a punch.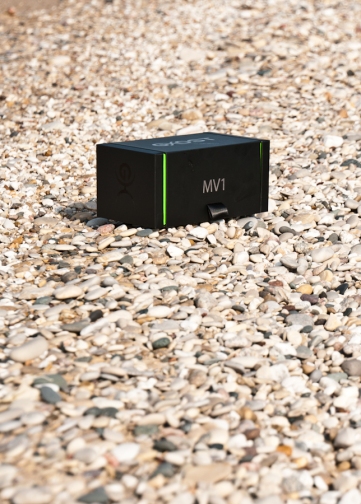
Although I definitely notice that higher temps provide more vapor and quicker extractions, sometimes I have a hard time getting my ABV ( Already Been Vaped ) super dark, like I would in some other vapes on a similar temperature. I can set the Mighty to say 380F and get really dark ABV, always. The Mighty is very good at getting consistent and exact temperatures, so you always get great results. The MV-1 doesn’t have any Conduction Heat and a Heat Exchanger that is always on, controlling the heat precisely, so its a bit more of a wild card in terms of temperature, extraction and vapor production. There are many factors that influence the temperature that your drawing through the Crucible, which creates mixed results but overall, the MV-1 delivers consistent results and the temperatures themselves feel fairly true. Occasionally, I nearly combust my material at times, usually if I have a full Battery, some super dry material, took too long or fast of a draw and or packed the Crucible unevenly, creating a hot spot. I can taste or sense when I am approaching this near combustion zone and I release the heat and continue to draw and draw slower to cool it down faster. This is part of the learning experience with the MV-1 because there are so many variables that go into vapor production and sometimes practice makes perfect. I was able to get great vapor on my very first draw ever on the MV-1 and with time and use, its gotten even better.
ABV is typically evenly heated and extracted, around 80% without stirring. Usually, there may be some fresh Material on the top or the edges of the Crucible but if you take care to properly dry, grind and pack your Material, you wont likely need to stir. You may also notice some pieces of material may be more fully vaped than others and this is dependent on the path the hot air travels through your material and the inconsistent sizes of the pieces of material, so smaller pieces are going to vape much faster than larger pieces. Its very important to not only grind your material to the proper coarseness but to also keep it evenly ground throughout. I would like to have a Crucible that I can flip over, so you can vape normally, get a lot of vapor from the bottom up and then flip the Crucible to fully vape the top of the material.
Concentrates
I am not usually a fan of using Concentrates and Mesh Pads with these portable vaporizers because the results aren’t as good as the results when vaping Dry Material or it’s the other way around and you get better vapor from Concentrates than Dry Material. I think vapes should be designed for one form of Material or the other, focus on that and make it the best. The MV-1 uses one of these Mesh Pads, although this one is slightly harder and more compressed than other Mesh Pads that are more flexible, softer and can pull apart. Vaping Concentrates with a full Convection vape like this, its usually not possible because they often require higher temps and / or a boost from Conduction heat, which the MV-1 does not have. I was pleasantly surprised with the results from vaping Concentrates with the MV-1 but this device really shines with Dry Material.
The Crucible with Mesh Pad and Extract. Start with a grain of rice amount.
To use Concentrates with the MV-1, you need to place your Mesh pad in a Crucible and apply a tiny amount of Concentrate on the top pad. Start with a grain of rice and set the MV-1 to Level 6 or Concentrate Mode. You don’t want to add too much and risk it melting through the Pad and into the Heater, so less is more with Concentrates. This mode should only be used with Concentrates and the other 5 settings should only be used with Dry Material because not only are they different temperatures, but they also heat differently, using a specific heating algorithms depending on your temperature selection.
When you use the MV-1 in Concentrate Mode, it vibrates immediately and you begin to draw immediately. The first draw melts the Concentrate into the pad and warms everything up. You will not get vapor from the first draw and maybe the second but usually by the third. From then on, take long, steady and fast draws and I recommend drawing longer and maybe faster too, than you normally do when using Dry Materials. I do not use Concentrates much and when I do, I typically use Vape Pens mostly, but I was pleasantly surprised how good the vapor was with the MV-1 and the flavor is incredible. A little goes a long way and you can really get a ton of draws off of a tiny amount of Concentrate. The device does warm up quicker in this Mode, so I recommend holding the vape with all of your fingers below the metal Crucible Door and that usually helps keep the rest of the device cooler, longer because your hand isn’t transferring the heat from the door to the rest of the vape as quickly, it really makes a difference.
-Cleaning / Maintenance
Cleaning and maintenance of the MV-1 is pretty minimal but there are a few parts the regularly need a good cleaning. I typically clean my Heat Sink assembly every 10 or so charges or whenever I sense decreased draw resistance or the Heat Sink holes look super dirty. If you are careful and keep your MV-1 clean, it will reduce the necessity to deep clean and it will preserve the flavor and performance of your vape. I use screens in my Crucibles to avoid debris from falling into my heater and I brush my Lids and Crucibles out right after a session, while they are still warm for easier cleaning. Also having a removable Chamber like the Crucible, helps keep the vape cleaner for longer. You basically only need to clean the Heat Sink and the Crucibles and also wipe down the silicone Seals every so often. I really wish Ghost had allowed for users to take these two silicone Seals out for easier cleaning and replacement because they could become damaged over time and / or lose their tight seal.
I recommend cleaning the device after a session or when its still warm and the oils / residue are soft and easier to remove, otherwise it can be a really sticky mess, especially inside the Heat Sink and around the ceramic Sleeve inside.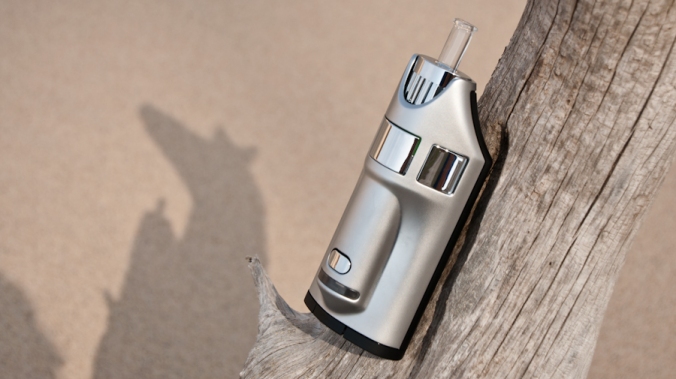
The Heat Sink is made out of cast metal and chrome plated or something, same as the Crucible Door and they both feel a bit cheap. I would have liked to see some machined parts instead but that may not even be possible for the Heat Sink and it may not make any difference anyways. The entire Heat Sink and Crucible / Lid can be soaked in Alcohol, which makes cleaning a breeze. Do not soak the rubber Gasket and plastic cap of the Heat Sink because they do not get dirty and the Alcohol can damage these parts. The important thing is to keep good air flow, so be aware of the air path and holes throughout the Heat Sink and make sure they are all clear. Brushing with alcohol and rinsing with how water is all that’s needed. I let my parts air dry to avoid lint or I use a lint free cloth.
When your reassembling the Heat Sink, its important to make sure everything is clean, dry and lined up. Don’t force anything and parts should go back together smoothly. Everything can only be put in one direction, so you can’t really screw anything up, too bad… Once you have fully assembled your cleaned Heat Sink, use the palm of your hand to cup the bottom of the Heat Sink, where the holes are and create a seal. Try to take a draw with your hand covering these holes and if you can still draw air, then re-position your hand, draw again and if you can still draw air, there is most likely an air leak inside the Heat Sink and you need to take it apart and re-assemble. Its very important to make sure the Heat Sink is working properly or you will not be able to draw the hot air efficiently through the Crucible.
When placing the Heat Sink back into the MV-1, keep an eye on the silicone top Seal as I re-insert the Heat Sink slowly because you could possibly push it out of place if its not lined up and I recommend having the Crucible Door shut when re-inserting the Heat Sink into the body, to make it easier and also keep the Seal seated. 
The Crucibles occasionally need to be soaked in Alcohol but as long as the Crucible rim is clean, the holes are open and the Lid holes / rim are clear, they are good to go. They do stain with use but soaking them can bring them back to almost new again and again. You can also chip and break Crucibles if your not careful but I have yet to break any but I have noticed a few chips missing, probably from cleaning and tapping on them.
Tips and Tricks for Best Performance
Once you use your MV-1 for a while, you will notice what techniques work better for a specific herb. A moister, fluffier herb may require a finer grind, less material in the Crucible and a longer, faster draw to get the same visible vapor as a drier herb that is dense, so you can add more to the Crucible, draw slower and for less time to achieve good vapor. Above all else, remember to pack the Crucible loose but to the top and I shouldn’t even say pack because you don’t want to apply hardly any pressure to your material, you just want it filled loosely and completely. Experimenting is necessary to find out what works best for you, your material and your preference, because there are a lot of variables that affect vapor quality / production with the MV-1 and every Vaporizer but more so with Convection Vaporizers.
Here are some tips and tricks that will get you on the right road to Vapor Villa:

Properly filled Crucible: to the rim but not over.
Lid should not apply pressure to material
- Select material: The drier the better and the higher the quality, the better. Herb that is slightly moister will vape but your more likely to get less quality vapor and less extraction, because if the added water content that must also be vaporized for the active ingredients to vaporize themselves. If my grinded material is not totally dry, I’ll let it sit on a piece of clean paper for a few minutes and that will help pull out excess moister and help speed the drying process. If your herbs are HIGH quality, they will have higher active ingredient content, so this greater concentration of Oils, Terpenes, etc. will make it easier to pull that vapor out.
- Grind material: I’ve found that its just as important to have an even grind as it is to have the right grind size or coarseness. I recommend something in the middle, not too fine that it will fall through the Crucible Holes but not too big either. Surface area is key with Convection and the more the better and make sure your grind is even with no bigger chunks. Again, specific material may vaporize better if its ground finer or left more coarse.
- Load Crucible: This is very important and please see my photos for visual aid. LOOSLY load the Crucible and I like to tap it, bounce it a little on my table to make sure herb settles and fill all the voids, nooks and crannies so you’ll have better air-flow through your material. Fill it to the top but don’t overfill. The Lid should hold the herb just enough not to put pressure on it but not so loose that it moves around, although it will vape less than full Crucibles.

Too much material and air flow will be impacted. You are more likely to get “Hot Spots”
- Extend the Mouthpiece: This is another important step to ensure the best experience. The further you extend the mouthpiece, the less restricted the draw and the more vapor you will get. I extend it fully, until the little “notches” on the glass Mouthpiece are lined up with the Gasket. If you like a tighter draw or want less vapor, try pushing the Mouthpiece in a bit. It is also very important to make sure the Heat Sink’s top is level with the body of the MV1 to make sure there is a proper seal and that the air is pulled through your material. If your performance is lacking, you may have an air leak somewhere and if the Heat Sink is positioned correctly, then the air leak is probably coming from the Heat Sink assembly itself or the Crucible Door. Check the Door and make sure its completely shut. Next take out the Heat Sink and cover the holes at the bottom with the palm of your hand and try to draw. If you can still inhale or draw, then there is an air leak, so take the Heat Sink apart and re-assemble and repeat the test.
- Load Crucible into MV1 and Select temp: Carefully load your Crucible into the Door of the MV-1 and make sure the Lid is positioned correctly and close the Door. Its very important to make sure the Lid is seated properly and the holes in the Lid and Crucible are free and clear. Select your temperature and I recommend starting Low and bumping it up if you desire. Lower temps bring out all the flavor and higher temps bring out the potency.
- Take a draw: Hold the Vape Button until you feel the second and longer vibration, signaling its time to draw. Start slow but draw steadily and draw for 5-15 seconds. I usually do a quick count in my head, as I’m drawing, till 7-10 and then I let go of the Vape Button and continue to draw for a few more seconds. If your not getting enough visible vapor or taste, draw faster and longer. If your getting to much vapor, draw slower and shorter or try disengaging the Heater sooner and continue to draw after the Heat has stopped. Your draw has a huge influence on vapor production and quality with the MV-1, much more so than most other vapes.
- Draw some more: I usually take 7-10 draws to finish a Crucible on levels 1-2, less on 3-4 but it depends on the material, draw style and temperature. You may find that a quick stir of your material a few draws in is beneficial but I usually don’t.
- Experiment: This vape is kind of fussy when it comes to following the “rules” but you can still get vapor if you just throw something in the Crucible. If your like me and like to experiment, you will quickly find what works and what doesn’t. Uneven heat? Make sure that Crucible is properly loaded. No vapor at all? Make sure your Heat sink is fully seated in the silicone and the top is also level with the Body of the MV-1 and make sure your Mouthpiece is properly in place, with no air leaks.
Pros
- Great flavor and vapor quality. Flavor seems to last longer
- Smooth, cool, comfortable and potent vapor
- Powerful Dual Coil Heater: Full Convection Heat
- On-Demand Heat: Nearly instant heat and vapor production. Instant satisfaction
- Minimal draw resistance
- Ability to use small amounts of material
- Great build quality and materials. Design feels very solid
- Durable metal Body
- Innovative and unique design
- Dual Use
- Removable Battery Pack
- Long lasting Battery life
- Removable chamber
- It vibrates
- Ergonomic and comfortable design
- Phone App with great features
Cons
- Somewhat of a learning curve for best vapor quality and production
- Proper grinding, packing, and drawing are required for best performance
- Vapor production can be inconstant
- Larger and Heavier than most portables
- Requires phone App for 2 custom Settings
- Limited temperature selection without the App
- Somewhat small Chamber
- Lack of digital screen
- Battery indicator could be more accurate
- Possible to near/combust material with improper techniques
- Sometimes stirring material is helpful
- Crucible Lids do not lock
- Audible electric humming noise
- Not the best vape for a group
Conclusion
 The on-demand, full Convection Heat, combined with a removable Chamber, removable Battery Pack, full temperature control, dual use capabilities and outstanding vapor quality make the MV-1 my new favorite portable vaporizer! As you have read, there is a lot to this vaporizer and a lot of thought went into the design of this vape and I believe it is one of the most innovative and effective portable vaporizers out today.
Flavor and vapor quality really stand out with the MV-1 and its often the vape I grab when I want the absolute best and fullest flavor from my Material and it provides the most potent hits, draw for draw. The vapor quality is incredible and comfortable! The MV-1 produces some of the smoothest vapor I have ever experienced out of a portable vaporizer and its almost like hitting a Balloon because the vapor is so cool. You can easily blow huge clouds with this vape but it does require a little practice to get it just right.
This is the vape for the real “canna-issuer,” the flavor snob, the vape geek and medical user. It brings out all the flavor and active ingredients your material has to offer and the potency speaks for itself. You can easily achieve your desired effect with the on-demand heat and you can take a draw, put it down for a while and pick the device back up and continue from where you left off, so its perfect for medical users. The MV-1 is comfortable to hold in either hand and there is almost no draw resistance! Even though I truly love to load and use the MV-1, it does require some practice and understanding to get the absolute best results and for this reason, I don’t know if I can recommend this vaporizer to everyone. Even though the MV-1 may not be my first choice vape for beginners, it is my first choice for the vape enthusiast, those who demand the best vapor quality and taste and the MV-1 delivers that. I own and have used A LOT of different vaporizers over the years and the MV-1 is special, it’s the vape I’ve been looking for. Thank you very much for reading and I hope you found it helpful and informative. Keep Vaping!
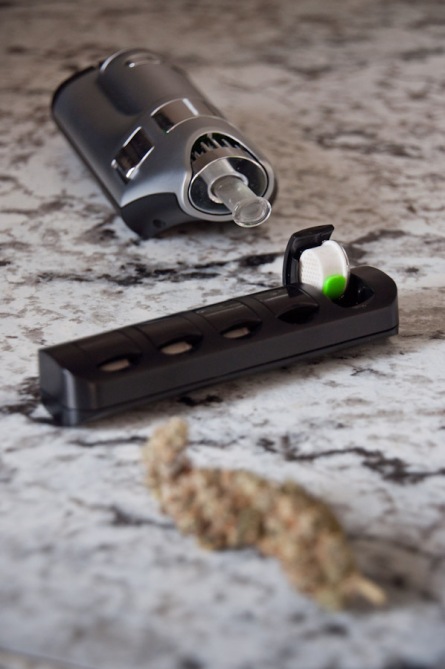
 The Square is the 2nd vape to join the Haze family and offers users something completely different than their famous Haze Dual Vaporizer. The Haze Dual was the first dual chamber vape to hit the market and was easily one of the best, truly dual purpose vapes that worked as well with dry herbs as it did with concentrates. The Square not only features 4 chambers instead of 2 but it also heats completely different with on-demand full convection heat, whereas the Haze Dual was a session style vape that heated to temperature and stayed there providing mostly conduction heat. On-demand convection heat requires only seconds to reach temperature and only heats your material when your drawing on the device, so no material degradation and will likely provide more flavor and the flavor will last longer too.


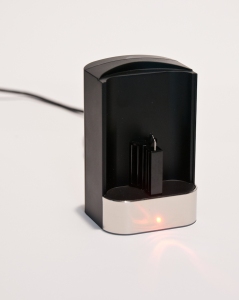
 When I first saw the Sidekick, I thought it looked great, certainly unique and interesting with bright colors, a “Vortex” cooling rod, glass mouthpieces and bubblers and even a stirring mechanism. Stir while you vape? I’m not gonna lie, I thought oh, you need to stir this vapes material, so it must not heat evenly or efficiently…. I was skeptical on the whole design but I decided to give it a shot with a pre-order discount and some amazing accessories. I’m really glad I gave the Sidekick a go and I am now a fan of the stir mechanism, not only because it helps heat your material evenly, which it can do without the mechanism but because it helps maintain the flavor and keeps your material from overheating between draws. This vaporizer is stoner-engineering at it’s best, a Vortex to cool the vapor! A stir mechanism! Glass mouthpieces! Things only someone with a HIGHER understanding can appreciate! A lot of thought and love went into the design of this vaporizer.
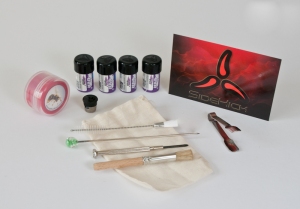 e such a solid vaporizer and you know it’s made here in America! Add some custom hand blown glass accessories and mouthpieces to the mix and you truly have a top quality vape that you can feel. The finish on the Silver Sidekick is just amazing, it’s pearlescent, smooth and it really catches your eye. I also have a Black Sidekick which is still really nice, super smooth as well but the Silver just pops. The body has a nice curved shape, so not only does it fit pretty comfortable in your pocket but it’s also holds really well, left or right handed! I’m right handed but I switch it up and I don’t have a problem using the Stir Mechanism with either hand, it’s just in a good spot and feels nice. Everything is quite smooth and nothing sticks out to catch things on and even the buttons are metal! There is a little rattle to the device but it’s minor and it comes from the buttons that have a little wiggle room and I think the Vortex Spiral as well, inside where it has a little room for easy removal. Overall, a very solid vape and I think this is definitely one that will last and last.
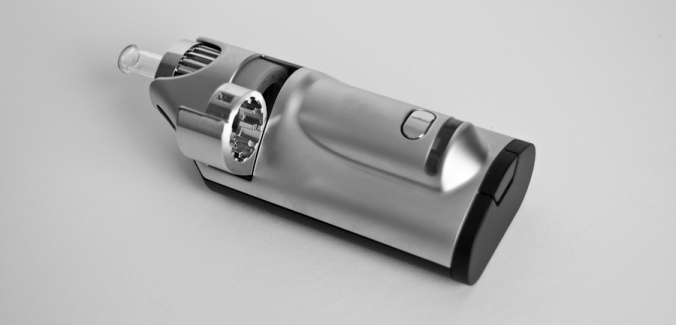
 Sidekick is mainly a Conduction heated device and majority of the heating is via direct contact with the walls of the heated chamber but it is said that it also has some Convection heat to the mix. It’s a hybrid heating device, most similar to the Inhalater’s hybrid heating style. In both vapes, most of the heat and vaporization occurs from the Conduction heat coming from the walls of the chamber but the air is pulled in and around the outside of the heated walls of these chambers and thus adds heated air, Convection heat to your material. I think the Convection heat is pretty minimal in both devices but I think there definitely is some going on which adds to the overall experience. that being said, there is nothing wrong with good Conduction Heat and there are many benefits but Convection heat is still my preferred heat.
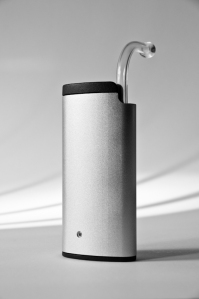 with use, become naturally non-stick and offers protection from deterioration. I have no problems to report with the Chamber thus far but I do wish they offered a screen or some type of different bottom because all of the stirring pushes a lot of debris through the bottom. Luckily they have thought of that and have a port that can be accessed by pulling out a Silicone plug, allowing you to clean underneath the chamber, otherwise I wouldn’t by this device without that feature. A little tray or pan would also be awesome, so you could just slide that out, dump it and be done instead of fishing around with pipe cleaners trying to get everything.
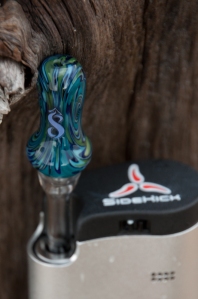 Another interesting area of the Sidekick, the mouthpiece and the vapor paths. First of all, 7th Floor offers custom, hand blown glass mouthpieces and bubblers by their in-house blowers who specialize in artisan borosilicate glass pieces that add style, performance and purity to the vaping experience. 7th Floor also offers Foreign Artisan glass bubblers that are also very nice but at a more affordable price. I have picked up a few pieces; a Elev8 custom bubbler with Unobtanium / Cobalt blue, a Elev8 custom mouthpiece with Unobtanium / Cobalt Blue and a 90 Degree angled custom mouthpiece but they only offer 180 and 120 Degree angle mouthpiece now for use with bubblers / water pipes etc. I really love my angled mouthpiece for a more laid back draw and the Cobalt Blue mouthpiece is gorgeous with swirls of Blue Cobalt and Unobtanium. The bubbler is also insane and takes vaping to a higher, smoother level and it works great but it is a little difficult to clean and be careful, if your Sidekick tips over, especially with the bubbler or your mouthpiece extended, it will likely break.
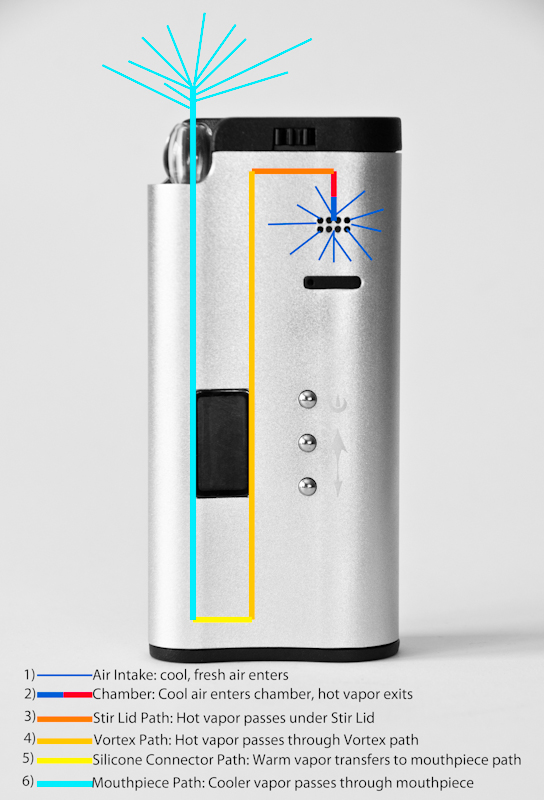 Sidekick features a loooonnnngggg vapor path up to 18 inches with the Vortex Spiral! Way longer than any other vaporizer that I know of, including the Plenty, which is probably the second longest. Not only is the vapor path long for extra vapor cooling effectiveness but it also features a Stainless Steel Vortex Spiral that spirals your vapor into smooth, Rocky Mountain air freshness. A long vapor path is awesome but it’s also a pain to clean but definitely more awesome. The Sidekick’s vapor path is broken up into 3 or 4 main parts; The air intake / chamber / Stir Lid, the Vortex Spiral path, a Silicone / Stainless Steel connector and finally the mouthpiece / tube path. All of which can be completely removed and cleaned! So air enters through a series of 8 holes on the body, beside the heater which gains heat as it goes around and up through the 8 holes in the chamber, through your herb, through the Stainless Steel screen of the Stir Lid, along a sandwich of Stainless Steel of the Stir Lid and down into the 2nd path. The 2nd path goes from the top of the unit, through a tiny Silicone section and into the Vortex, which is housed inside a Brass tube or choose to take the Vortex out but it adds 7 more inches of vapor path and then into the 3rd path. The 3rd path is a Silicone U-shape connector with a Stainless Steel bottom, which connects the Vortex path to the mouthpiece path. Finally the vapor leaves the Silicone U and enters another tube, I believe a Stainless Steel tube where the mouthpiece sits inside and the vapor exits through. Altogether a long a crazy ride from air intake to vapor exit but it’s an important path that really does an amazing job cooling the vapor and allowing it to expand. Some prefer a short path, it may produce more potent vapor and some may prefer a longer path for smoother, more filtered vapor but it also may be less potent. I have not noticed if the vapor is less potent with the Sidekick but it is smooth and the effects are definitely there. You can choose to also remove the Vortex altogether for a slightly less restricted draw and for some reason, I have noticed that the flavor seems to be somewhat better without the Vortex. For the absolute coolest, smoothest draw, take the Vortex out, pop it in the freezer, get your bubbler in there too and then pull them out when their both good and cold, add your cold water and prepare for some amazingly cool and comfortable vapor. I am skeptical about whether the vapor actually follows the Vortex path, spiraling all the way down or does the vapor just pass down the side of the Vortex, along the tube? The Vortex doesn’t have a super tight fit, especially around the spirals, so I think the vapor could more easily by-pass the spiral and just go straight down. Either way, the Vortex adds some filtering action but I will try to come up with a test for the spiral action of the Vortex.
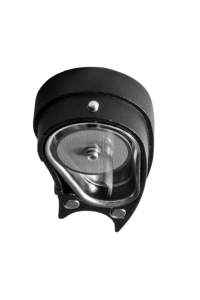 Stir your herbs
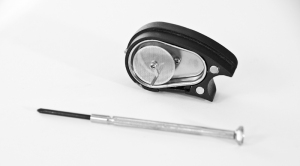
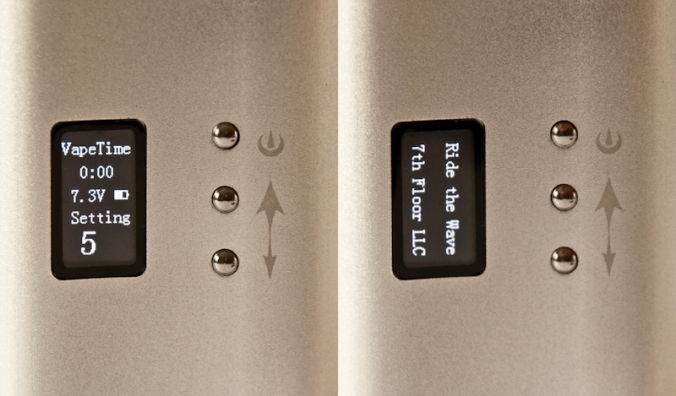 Sidekicks has 3 simple buttons to control the device; Power / Heat, Up and Down Arrows. The buttons are metal and have a great click so you know your hitting the button. Hold the power button to turn the device on and use your Up and Down Arrows to select your level and then hit the Power button once to start heating. I’m not a fan of the 5 clicks to power on a device, so I’m glad you just have to hold the power instead. The timer will start counting once the device starts heating and it will vibrate twice, letting you know its ready to use. The timer is nice feature and I like to know how long it took to heat up and how long my session lasted.
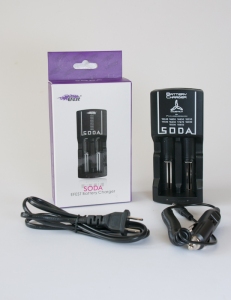 the bottom of the unit, inside a plastic shell that is directly below the chamber. They are accessed underneath yet another metal part, the battery door. The battery door is nice and has a good latching system which stays shut. Opposite side of the battery door latch is a small plastic notch that the battery door hooks into and its quite thin. I can easily see this piece breaking at which point you will have to find another way to hold your battery door in place. Mine has held up fine but I am typically careful with all of my vapes.
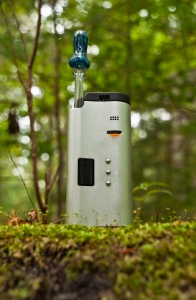 I really enjoy using the Sidekick, it’s fun, easy and effective. Loading the device is easy but it’s also easy to get herb all over the top of the device and into the Vortex Vapor Path if your not careful but I made a screen “plug” that fits into that hole, preventing any debris to enter that vapor path. I recommend grinding your herb medium or fine, but constantly so there aren’t any big chucks, so everything gets heated at the same rate. I like to fill the chamber to the bottom of the Silicone Seal around the chamber and keep it loose. I found that filling the chamber to much or packing to tight can make it hard to replace the Stir Lid on top and can make stirring harder. Also, if you over pack, I have found that some herb likes to stick to the top of the Stir Arm so often it remains in-vaped because it hasn’t had a chance to come in contact with the heated walls. This chamber is also good with small amounts and that Stir Lid makes sure your heating every piece. I have noticed that with smaller amounts, my ABV is usually darker than it would be if it was a fuller chamber, so sometimes I’ll turn down the heat a little to compensate.
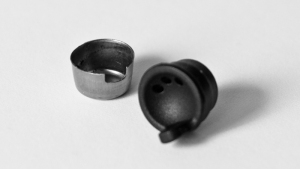
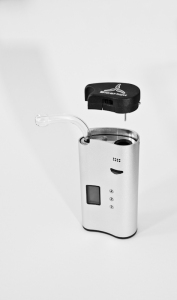 I prefer to use my “First Run” Sidekick on levels 4 – 5.5 ( 330F – 357F ) or around 5 – 6.5 (320F – 365F ) on the “Second Run” Sidekicks, which have a slightly different temperature range. I found the relatively lower levels produced better tasting vapor for longer and yet still provide rich, fully browned ABV. I typically start my vape at lower temps to savor the flavor and then turn them up later for the effect, after the flavor has fallen off. I thought the temps on the Sidekick seemed fairly consistent with my other conduction vapes and produced similar colored ABV but maybe ran slightly hotter than my other vapes. My sessions typically last around 5 minutes with the Sidekick and I find that the materail is mostly spent by then but sessions with concentrates can last quite a bit longer and a little goes a long way. The dry material ABV is always uniform and evenly heated, thanks to the Stirring Mechanism and you can be assured that the Sidekick will extract all the necessary active ingredients of your herbs. The Sidekick can definitely roast your herb to the point of near combustion, so if your someone who prefers a thicker vapor, the Sidekick can provide it but it can also produce, light refreshing vapor with full flavor and a mild effect if that’s what your after.
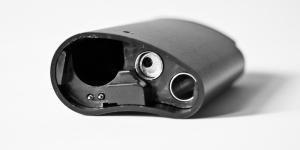

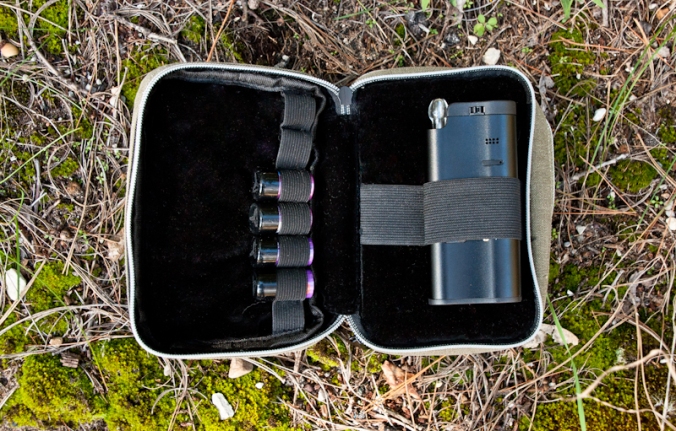
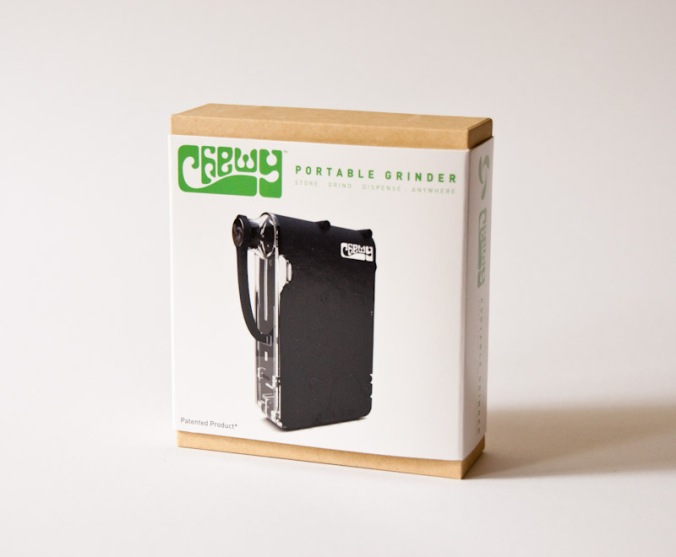
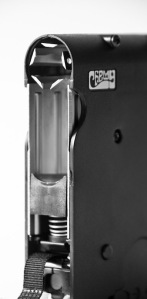 ny grinders over the years and they are basically the same old thing with the same old “teeth.” I have always been partial to the classic metal grinders and some of my favorites have been; Cali Crusher Homegrown, Sanat Cruz Shredders, SLX 2.0 (non-stick), SpaceCase Titanium, the classic Storz and Bickel acrylic grinder and my daily driver the GR8TR VAPE by Kannastor because of it’s ability to grind specifically for vapes, meaning super fine and even, always. My new favorite is the LinCig grinder, similar to the Lift Innovations grinder that has a completely new blade system, instead of teeth, which I HIGHLY recommend checking them out.
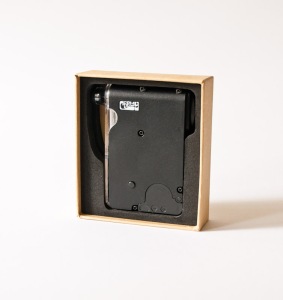 this review, I will be testing the Black Chewy with a plastic body ($49.99) but they also come with metal bodies ($89.99). The Chewy uses a 9V battery to power it and features a sharp rotating blade, not teeth, like traditional grinders and forward / reverse buttons that control the blade. The design is thoughtful, effective and compact. I especially like that the internals come out for cleaning because it will get sticky with use, so it’s very important to clean your Chewy occasionally to keep it running smooth. The Chewy’s flat design makes it possible to carry in your pocket, unlike other grinders that are too bulky and Chewy allows you to store your herb inside, so whenever your ready you just have to hit the buttons and out comes your ground herb.
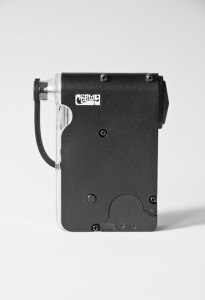 was somewhat disappointed with the plastic body of my Chewy and I plan to eventually spring for the metal body, which I hope will be a little more ridged and provide better durability. The Chewy is fairly solid and with a battery, it has good balance and fits the hand nicely. I would have liked to see the edges of the Chewy to be more rounded for more comfortably but it’s not bad or awkward. On the top are the controls, the back opens up for the battery and the bottom is the business end where you load your material and the chopping takes place.
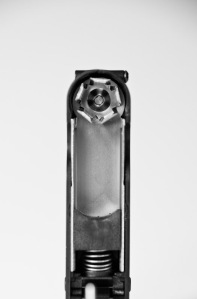 can be completely pulled out and act as a good bowl or chamber packer with this flat end opposite of the poker. As you open the Chewy door, it pulls a strap that is attached to the “pusher block” and cocks it into a locked position when the door is fully opened, allowing you to load your material in the “sleeve.” When your done loading, close the door fully and hit a button on the Chewy to release the pusher which presses your material tightly against the blade and feeds your material as your grind away. The pusher block has a couple of groves in it’s side that follow a track in the sleeve, so it stays on track and moves smoothly. The spring is powerful enough and does a good job feeding the material into the blade and I typically only have problems if I am using a small amount of herb or the insides are dirty and sticky. Luckily, the sleeve and blade comes out easily, so your can clean it again and again. Sometime I have noticed that the pusher block doesn’t always reach the end of the track when I hit the release button, so I will open the door slightly and that usually does the trick.
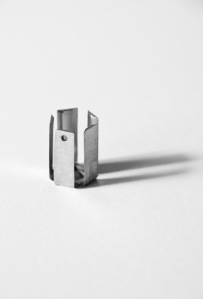 hewy’s blades are very unique and there is nothing like them in any grinder. They feature 5 sharp blades that combine to make a cylindrical shape of slicing, cutting fury. The blade has a hole in the end that magnetically attaches to the motor that has a small end that pokes up and fits into the blade for rotation. The blade goes in easily and comes out easily as well and they have also added a small hole on the end of the blade that you can use the built in poker to remove the blade which will keep you from loosing a finger…..I think there is room for improvement with the blade and I have noticed that it works great with some herbs and not so well with other herbs, depending on moisture content, density and stickiness. There are small gaps between the 5 blades that make up the “cylinder” and if these gaps were smaller and maybe had more of these blades, I think that would allow for finer grinder and prevent large pieces from passing through the gaps. Another idea would be a cylinder that features a series of sharp holes like the Grinder Cards or a cheese grater that would spin and slice away at the herbs and with the re
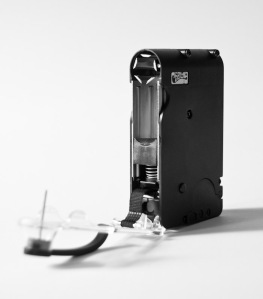 movable blade design, I hope Chewy will some out with new blades for different materials and grind consistencies. Another area for improvement is the blade chamber which is plastic on this model but must be metal on the metal bodied Chewys. The blade is able to slightly rock a little on the motor end and sometimes the blade can get pretty close to these plastic walls and could possibly shave off a piece of plastic, so I wish they had added another removable metal sleeve for around the blade that would help prevent any unwanted plastic shavings.
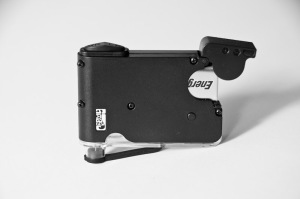 Chewy’s back features a door that flips out on a hinge and is where your 9volt battery is inserted. The battery goes in and comes out fairly easily and it securely snaps into place. Although I haven’t had to change my battery yet, I wish they had used a rechargeable battery and allowed grinding while charging. There are rechargeable 9v batteries out there, so that’s the next thing I will be testing but I used a standard Energizer 9v for this review and it’s still going strong. I’ve had the same 9v battery since I got the Chewy in September 2016 and it’s got a lot of use. I tested the Chewy pretty heavily when I first got it and I am pleasantly surprised that the battery is still going but I have noticed some loss of power and sometimes it binds up a little, now that battery is getting weaker. It’s hard to gauge the exact battery life of the Chewy because your only using it for a minute or so at a time and it may have to work harder with some herbs and less with others but according to their website, the Chewy can last up to 9 hours of continuous use! Overall, I have been happy with the battery life and I
  think it’s really quite battery efficient.
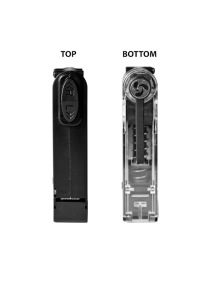 y’s motor and blade system seems to be pretty powerful and geared correctly. The blade spins very slow but it’s pretty powerful and I haven’t noticed the motor seizing up or stopping, until recently now that my battery is getting low but even now it still does pretty well.
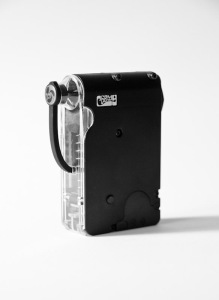 e used your Chewy for a while and it’s stickier. A lot of times, I have to use the poker or something else to free up stuck herb and get it to go through the blade again or drop out the funnel. When the Chewy is fully loaded with the right herb, it is really nice and you can just aim the funnel over your chamber or bowl or paper and watch the herb fall into place. It also makes grinding on the go, much more convenient and less messy. You can also store your herb in the Sleeve or funnel ground up for immediate use but I typically don’t because it’s not sealed completely, so it smells and dries out quickly.
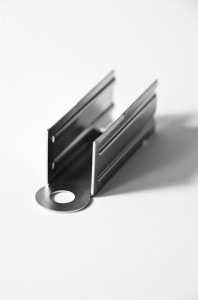 e Chewy is pretty easy to maintain and clean when the time comes. I like to brush mine out after using it and before I take it apart. A lot of sticky residue can build up quickly and it’s important to keep it clean, so the Pusher Block can freely move and feed your herb. All of the important parts that get the dirtiest, the Blade and the Sleeve come out and can soak in Alcohol for easy cleaning and the rest requires a little more work. The Blade comes out first, either carefully with your fingers or you can use the Poker to pop out the Blade using the hole. Next, comes the Sleeve, which will lift up and you can slide it off of the Pusher Block. While those pieces soak, I brush out the inside and get all the big stuff and come back with a q-tip with a little Alcohol, to get all the sticky stuff and clean up the door, the funnel and the Pusher Block. Make sure the sides of the Pusher Block are clean and your basically ready to reassemble after the
  Sleeve and Blade are done soaking and clean. It goes together in the opposite way, so take the Sleeve and start the Pusher Block, so it fits into the track and slide freely. Next, push the Sleeve into place, so that it’s fully seated. Now you can re-place the Blade, close the door and release the Pusher Block. Now your ready for more Chewing!
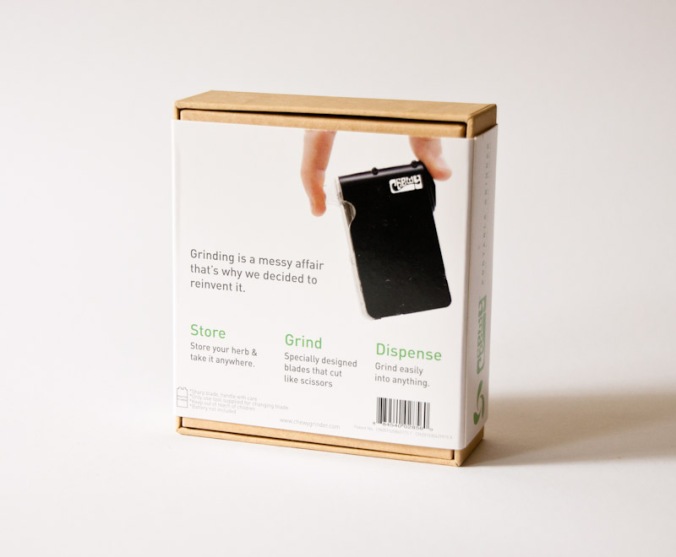
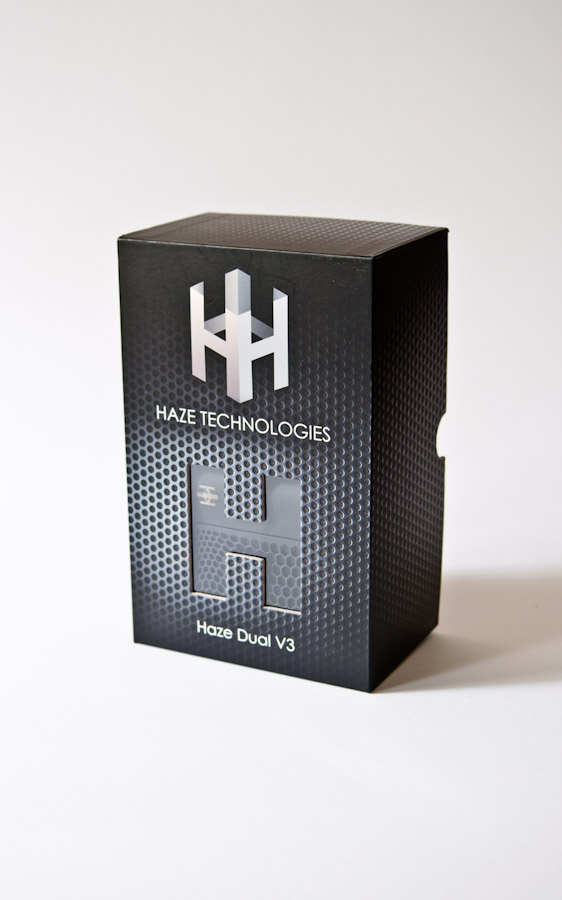 Introduction
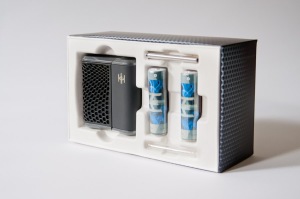 Haze V3 is the Swiss Army Knife of vaporizers! It does it all and it does it amazingly. concentrates, herbs, and oils, the V3 turns your material of choice into vapor with an array of accessories, screens and add-ons, there is something for everyone. If MacGyver vaped on his missions, he would likely choose the V3 for it’s all-in-one performance.
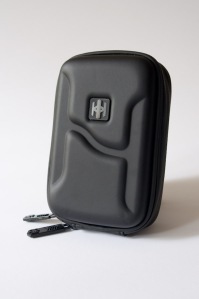 nless Steel)
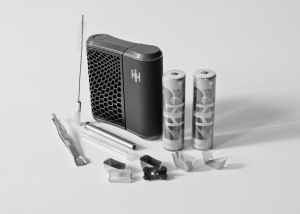 he V3’s design is compact, comfortable, practical, effective and durable. It’s unique shape feels equally well in your hand as it does in your pocket with it’s “curved” sides that hug you securely. Overall, the Haze feels very solid and reliable with it’s impact resistant battery latch to it’s re-enforced inner housing that can apparently withstand the weight of a motorcycle! It’s everything as portable vaporizer should be without all the nonsense and it’s a vape I can count on to deliver the goods. Haze even offers a 10 year warranty, which is pretty amazing and I believe it can definitely last that long with average maintenance.
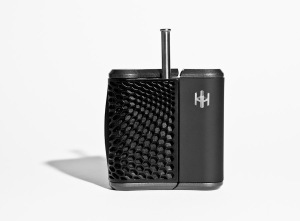 When you hold the V3 in your hand, you will most likely agree that it’s pretty bullet proof and quite possibly, literally bullet proof! Solid materials and solid construction make for a solid vape with little slop or rattling parts. The V3 is almost entirely plastic with the exception of a few key metal parts and the high temperature resistant, reinforced fiberglass material of the inner housing. The top and bottom of the device are in fact metal and it provides a quality feel and also balances the device nicely. It holds well in your hand and the curved sides make it comfortable to hold. The exterior is ISO and water resistant so clean-up is easy and worry free, unlike some vaporizers and parts I’ve cleaned in the past that have discolored, warped and faded with ISO.
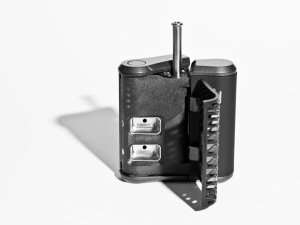 lock or less flimsy but it does the job and stays shut, although a magnetic lock would be nice instead. The removable / replaceable chamber seals are very nice and they attach to the chamber door with a layer of Silicone, so not only does it keep the chambers nice and sealed, it also keeps it insulated. It would be cool and practical if you had a Glass window on the chamber door above the chambers to see what’s in there, to watch the vapor and keep your chambers straight. The back side of the device also actually pops open like the chamber door, so you can even get behind that if need be.
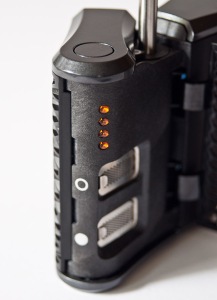 The V3 is easy to operate and adjust it’s temperature. Basically, just move the chamber selector lever to one side or the other to select your chamber and doing so, turns on the unit and it starts heating immediately to. To change your temperature, just hit the top button ( temperature selector button ) and notice the LED’s on the front; 1 LED for 365F, 2 LED for 380F, 3 LED for 390F and all 4 LED for 415F. The LED’s are nice and bright enough but the chamber door’s holes don’t line up perfectly with the LED’s, so some are slightly more covered than others and I thought they could have made that look a little nicer. You have 4 temperatures to choose from: ( 365F, 380F, 390F and 415F ) where you can vape dry material on all 4 temperatures and 390F and 415F are best suited for concentrates, although I get vapor on all 4 using concentrates, even temp. 1 but it’s definitely thin and wispy.
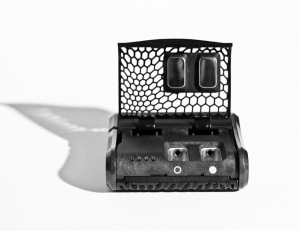 Chambers
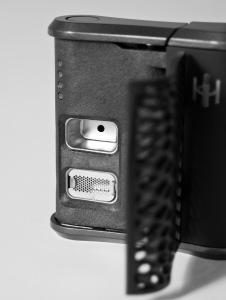 ome vapes claim “Dual Purpose” like the Haze but I don’t think any of them do both, as good as the Haze and as easily as the Haze with the exception of the Sidekick. The Sidekick vaporizer by 7th Floor Vapes is on the same level as the Haze in terms of ease of use, efficiency and ability to vape both mediums. Most vapes usually require wicks, steel pads or extreme heat to get good vapor but the Haze makes it effortless and the V3’s can pre-pack system is about as easy and mess free as you can get, they don’t require wicks or pads and they just really work. I also love that you have some variety between the way you load and use your Haze and you can choose from; “Conduction screens” that are open on two sides and offer more Conduction Heat, “Convection screens” which is basically a rectangular screen basket with screen on all sides but the top and offer less Conduction Heat and finally, the “cans” that offer pre-pack abilities, less mess and a contained load inside a Stainless Steel can. Whether you prefer to use the screens and load the chamber that way or use the cans and pre-pack, there’s something for everyone and you will get results. I prefer the cans and find them the most convenient for on the go use, provide excellent vapor and even heating and they keep the device super clean. The cans are a contained unit with a “sheet screen” that drops on top and a tab holds it in place with holes on the top and on one side that faces the vapor path. A track for the can’s top screen to slide into could be an improvement over the tab system that sometimes likes to pop off but they really work just fine. The concentrate can features the same base as the dry material can but instead has a Silicone top that specially designed to allow air flow and prevent leakage. I never had a problem with concentrates running out but I used very small amounts. I think these dry / concentrate cans are the best design I’ve come across for all materials and that make vaping anything easy and less messy without having to use steel pads that get dirty after one use or wicks that are good for one use etc but the cans can just be wiped out while still hot and they will taste and work as good as the first time.
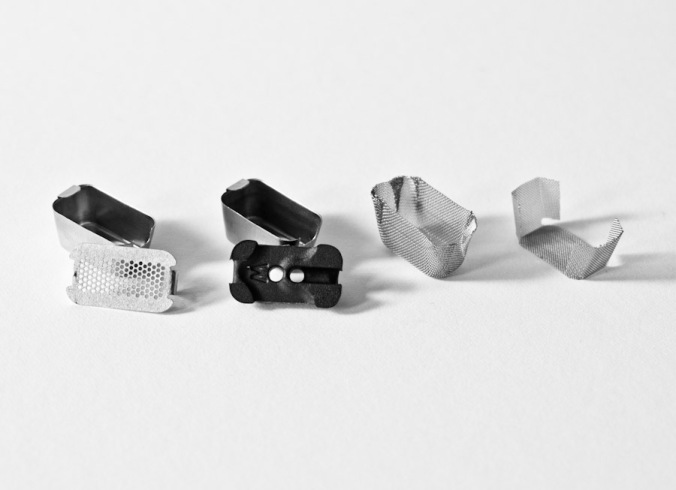
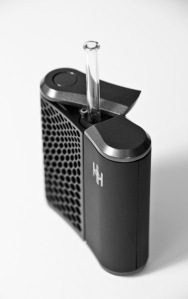 The Haze V3 has a very nice, comfortable mouthpiece and you can choose between Stainless Steel or Glass. I haven’t noticed a huge difference between the two materials but I would say the Glass may have slightly better flavor but the Stainless Steel seems to maybe have a slightly smoother draw. I still prefer the Stainless Steel most of the time but I do really like the feel of the Glass. The mouthpiece can be adjusted to any height, so you can have it short and discreet, fully extended for slightly cooler hits or anywhere in-between. The new design of the mouthpiece tip allows users to more easily grab it and extended it that the old version that was smooth but I wish they had a washer or “handle” around the mouthpiece, so you could grab that, rather than touch the very end where you will be inhaling from, especially if you have dirty fingers. I do really like that it stores away inside the body for portability and cleanliness but I wish you could keep it extended with the unit Off to clear the vapor path but the design does not allow that with the battery in place. The mouthpiece appears to have a seal near the top that holds it in place at any level and I haven’t noticed any stickiness after I’ve used the device for awhile but apparently that was an issue in their prior model, so I’d say they did a good job fixing that.
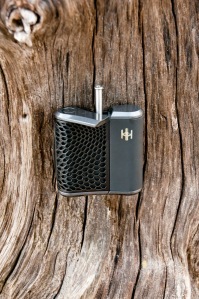
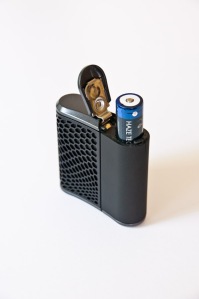 The unit comes with (2x) 2600 mAh rechargeable Li-Ion batteries, although you can purchase Extended Life (XL) batteries at 3200 mAh Li-Ion, which are one of the largest size 18650 batteries available and they provide 35% more session time. Both batteries come with a built-in PCB protection circuit, which prevents over discharge and extends the batteries life and they say to only use the Haze external charger for charging. I really wish they offered a Pass-Through system on the V3 for use while charging but you’ll most likely be using this device on the go, so not a big deal.
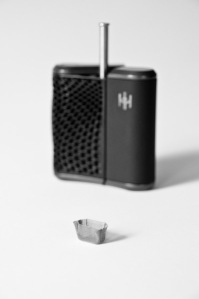 up. You will get a Red LED if your battery is really low and the LED’s will be dimmer as well but usually by then it’s too late and your not gonna have enough power for a session.
 As with most Conduction based vaporizers like the Haze, these vaporizers put out thick vapor that’s typically cooler than Convection based vaporizers and the flavor can be amazing, especially at first but I typically find that it tends to fade quicker than Convection vapes whose flavor lasts longer. With that being said, the V3 is a top Conduction vaporizer. I still prefer the vapor from Convection vaporizers more often because of the flavor, greater control of vapor quality / production, less rushing because it’s not always heating your material but Conduction has it’s own advantages over Convection as well.
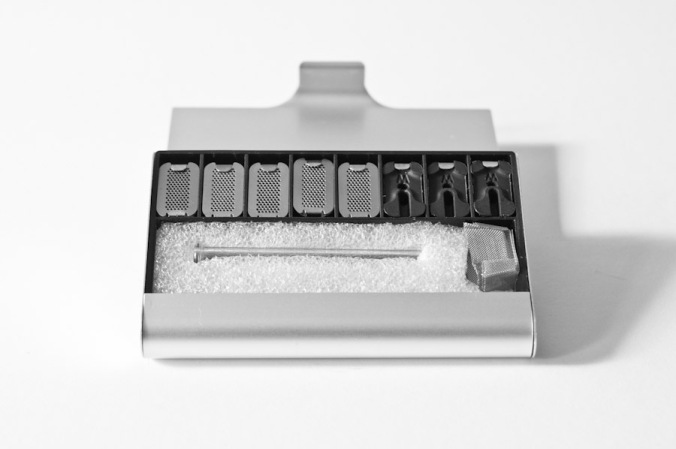
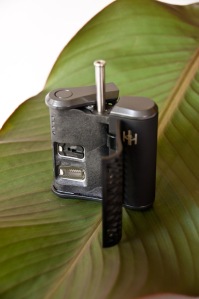 all types of weather and in all temperatures too. I tested this thing in the dead of Michigan Winter and it amazed me. Even though the LED light blinked more often when it was super cold, it still kept up enough to always produce a huge hit which definitely can’t be said about all vapes. Most vapes have a problem with cold outside temperatures, they bring the vapes temp down too quickly for it to heat back up and your left with weak vapor but the Haze has a new precise temperature regulator that maintains vapor production in any condition and at any altitude according to Haze. I couldn’t test the altitude claim but I don’t doubt the V3 will deliver!
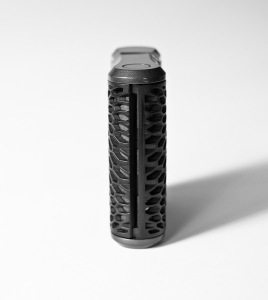 The Haze is also great with concentrates. I think it is one of the best portable vapes for concentrates, thanks to the powerful Conduction Heat and the concentrate cans. These cans make vaping concentrates easy and relatively mess free because you don’t need and steel pads, wicks or exposed coils. Just put a rice grain size of your favorite concentrate in the can and seal it with the Silicone lid or use the dry material screens for traditional extracts or dryer extracts. You can get light flavor and some wispy vapor on temp 1 but I recommend temp 3 and 4 for concentrates. The vapor tastes great and you get a lot from a little material and its very efficient in that sense because some vapes require a fair amount to get some good vapor but the thoughtful design of the cans makes it very efficient. I prefer the vapor out of this device over coil pens because its; smoother and you get a constant hit. The vapor can definitely be a little harsher than the dry material but your likely using higher temps so just puff on it and it’s perfect.
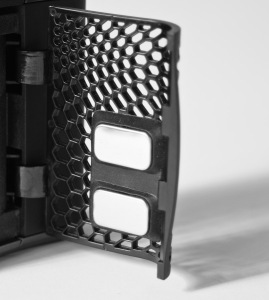 chambers to the main tube is a little tighter, so I’ll just twist up a little paper towel with some ISO and use that to get in there. Everything else should stay clean and the outside of the device is ISO and water resistant so it’s also fine to wipe that down too. One other area to clean is the chamber seals and they can be wiped off while they’re still hot to save you time down the road and / or they can be cleaned with ISO but I just don’t recommend soaking the Silicone at all or for too long because it can discolor, fade and eventually ruin some Silicone. You can also by replacement chamber seals on their website for $5.00.
 The Haze V3 is a serious vaporizer with serious features and powerful effects. I would recommend this vaporizer to anyone, people new to vaping and experienced vapers as well. It’s easy to use, maintain and you get great vapor anyway you pack it. The V3 offers users a lot of variety and accessories, even water pipes, so there is likely something for everyone. This is a vape you can rely on and it’s definitely a vape I bring on the go and especially on extended outings with its impressive battery life and the ability to carry spares for back-up. The Haze does it all, so if your into dry material, concentrates, Juice or all of them, this device can dish out the vapor no matter what your into. I think this vape delivers great, thick, comfortable and flavorful vapor that packs a punch no matter how or what you pack in those chambers. Although the Haze is a great vape, I have a few minor issues with the design of the device and I would have liked to see more temperatures and a better battery indicator. If your looking for one vape to do it all, the Haze V3 is your vape.

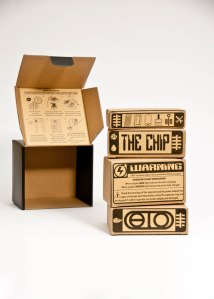
 Elo is an unusual vaporizer and it’s different than anything I have tried before. It’s rather simple looking on the outside but when you open up all the sliding doors and swing open the oven, you’ll quickly realize that there is nothing quite like it, which makes me like it even more. There are so many vaporizers coming out and so many of them are copies or clones of another vaporizer, so it’s nice to see something completely different and unique.
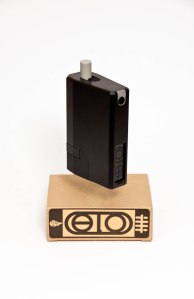 The Elo body is very sturdy, solid and it’s constructed out of aluminum, which gives it a nice heft. The top and bottom of the device are plastic but the aluminum shell makes it feel very durable and has a nice, smooth matte finish.
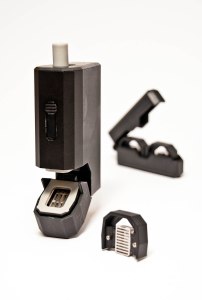 fully lowered. The third and final sliding door is located on the opposite side and this sliding door reveals the LCD, “Plus” and “Minus” buttons as well as the AC Charging Port. I really like the addition of these sliding doors and buttons, as they keep everything tucked away, safely inside the device while your not using it, so everything stays in its place and stays clean.
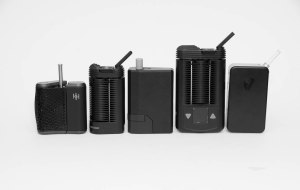
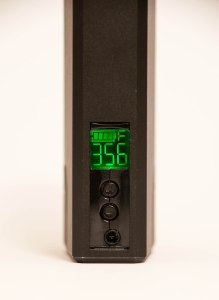 The Elo can be powered on by holding the On / Off button for 2 seconds and you will see the power button light up and the LCD turn on. The power button features a color changing LED light that changes color based on your temperature range selection;
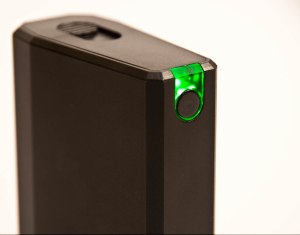 fter you have turned Elo on, the device starts heating up and from there you can set your temperature using the “Plus” or “Minus” buttons to make your selection with 9°F increments from 302°F to 410°F. The LCD indicates the battery level, set temperature and the Celsius or Fahrenheit indicator, which can be switched by holding the “Plus” button for 5 seconds to toggle between the two. The LCD is very simple and basic and it does not show the devices temperature as it gets hotter, instead the On / Off LED light flashes until it turns solid, indicating that device has reached your desired temperature. I would have loved to see the actual temperature indicated as well as the set temperature so you always know where your at.
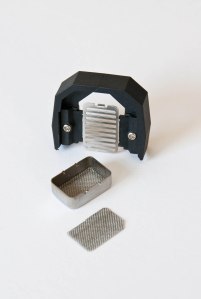 he main feature that makes the Elo so special and unique, is it’s removable material chamber, called the “Chip.” Elo allows users to swap out Chips with different materials to suit your needs, which makes vaping on the go easy and convenient. Elo’s Chip system works very well and I found it to be especially useful on the go, where I can have a Chip loaded in Elo and two extra Chips loaded and packed in the included Chip case for quick, hassle free vaping out and about.
 debris that can often fall through the cracks and otherwise be very difficult to remove. Yet another bonus to the Chip design allows you have a different loaded Chip for your every mood or preference, so you could have a Chip loaded with an herb that is more energetic for daytime use and another Chip filled with an herb that is more relaxing for night vaping. Although I think a removable chamber has more benefits than drawbacks, there are a few to discuss. The main drawback is that they usually require more time and patience loading them at home, since there are a few parts to assemble, they can be fairly small, hard to grasp and put together. Removable chambers can also pose other issues, such as creating more areas where extra air to be drawn into the pathways, as the fittings and seals may not always be perfect, so potentially, they can dilute the vapor and this is somewhat true with the Elo. With the Elo’s complex Chip system, there is some room around the Chip where air can be pulled in, which can make the vapor thinner and weaker but on the plus side, it can also make the vapor cooler and smoother but I will go into further detail later on. One other thing to consider, removable chambers can also get lost, loose parts or wear over time, which can be also be good and bad. On one hand, you can usually replace the part instead of the whole unit, which can save you big time but it also means that you more likely to have to replace
  something down the road when it gets lost or breaks. It really comes down to personal preference but for me, I’m a sucker for a removable chamber like the Chip, Inhalaters’ Capsule System, Hazes’ Cans etc. and I think the benefits outweigh the drawbacks.
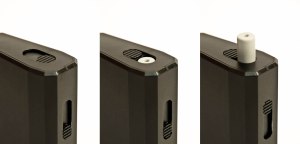
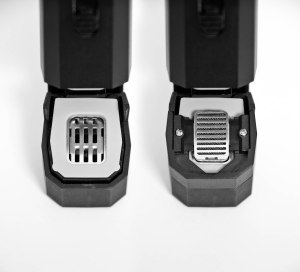
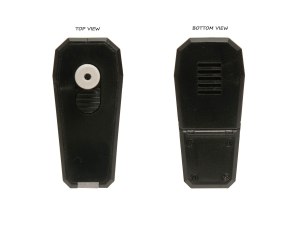 Elo’s vapor.
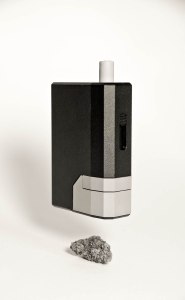 reasons but I would have liked to see an inner layer of metal for strength and the additional S.S. could also improve the flavor over plastic. I will go into further detail about the vapor in the Vaporization section. On top of the heater is the lower Silicone seal that presses against the bottom portion of the Chip, creating a seal. This Silicone piece is removable for cleaning and I recommend soaking briefly and scrubbing all Silicone, plastic and metal pieces before vaporization to help remove any extra tastes, residues, oils that come from these materials and from the manufacturing process / assembly of these devices. I have noticed that the Silicone and or plastic around the heater and or Chip creates a slight Silicone taste and smell at times, more so during the end of my session when the unit has been on for a while and is much hotter but again, it’s not enough for it to ruin the herbs flavor in my opinion.
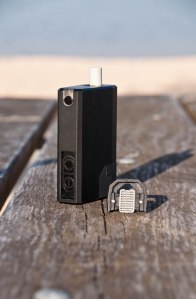 The heater is held in place on a hinge that connects it to the body of the Elo. As I have mentioned, by removing the heater from the main body, the electronics, the battery and your hand will stay cool during vaporization which is a great design. The heater can definitely get hot to the touch during use but there is plenty of cool Elo body to hang on to, so it’s not an issue but I would have loved to see some heat sinks or ribbing like they used in the Crafty and Mighty vaporizers deign, which do a great job keeping the unit cool I would have liked to see the hinge beefed up a little because this is an area of high stress and it will be used often, so there is the potential for breakage if your not too careful but I have not had any issues yet. There are also some wires that pass through this hinge area, so there is potential of the wires breaking like the dreaded Ascent that had it’s oven on a swivel and those wires often broke in the early versions until they corrected the issue. I have taken one of my Elo’s apart and there is plenty of wire length to freely move when opening and closing the oven, so it won’t put stress on the connections and I doubt if we will see an issue with wires breaking.
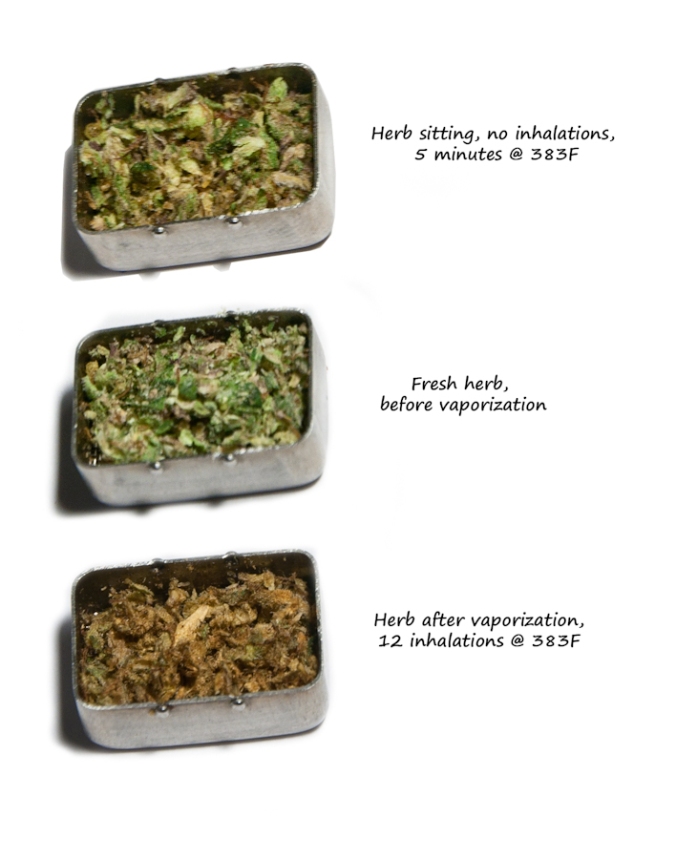
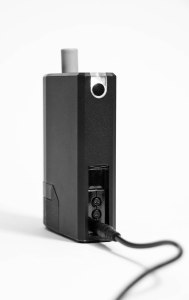 Unfortunately, the Elo does not allow for users to vaporize during charging and the battery is not user replaceable. This is one of my major criticisms of this device and its so sad to see a vaporizer that doesn’t feature either one of these. Batteries eventually all loose capacity and become weaker over time, so eventually they will all need replacements. When the user can’t replace the battery, then the vaporizer becomes useless, unless the manufacturer provides replacements like the Crafty and Mighty Battery Program where it cost up to $40 to replace their batteries.
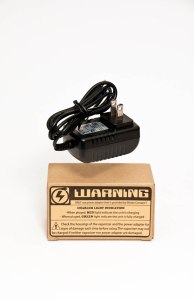 usually require more energy than conduction vaporizers and with Elo’s relatively large heater, it uses a lot of juice, so that can explain why the battery life isn’t that great.
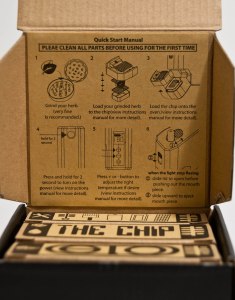 Elo is very user friendly and easy to use. When you first open the box, you will see a quick start guide and within 6 simple steps, you will be up and vaping!
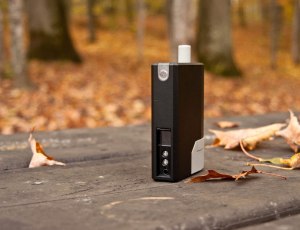 screen down all the way, so it’s touching the herb, but again, not compressing it, so the herb stays in place while the air is drawn through. One thing I dislike about the mesh screens is that they are tricky to place and remove and they can eventually get frayed with repeated use. I also have some difficulties clipping the S.S. material chamber into the Chip body and if it doesn’t snap in easily, I recommend turning it 180 and trying it that way and usually, one seems to go in easier than the other. Once the chambers are snapped into the Chip, they are pretty secure and stay put.
 but it’s completely normal and it will go away in a few seconds. The Elo heats up quite fast and it usually doesn’t take more than 40-50 seconds to reach any temperature. The battery level indicator on the LCD likes to jump around when the unit is heating up, so wait for the unit to reach temperature before checking the level and it should indicate an accurate level at that point.
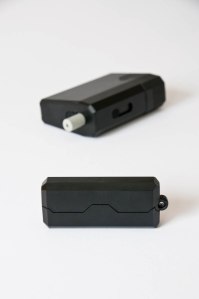 In short, the Elo produces nice, smooth, cool vapor that is flavorful but its not as thick or as visible as most vaporizers on a similar temperature. This is both good and bad. On one hand, I would like to see more, thicker, fuller vapor as it is often thin and feels slightly “airy.” On the other hand, the vapor is incredibly smooth, cool and comfortable and it never seems hot or scratchy, unlike a lot of convection style vaporizers that can be harsh or hot. I have noticed that the Elo seems to run cooler than most other vaporizers and I tend prefer using the Elo at 383°F-392 which would be way too hot in my Crafty, Mighty, Volcano etc. Even at that relatively high temperature, the vapor is still not thick or really cloudy but if you compare that to the Crafty the difference is huge and 383°F on the Elo is more like 340°F on the Crafty or around there. This dosne’t really bother me too much but I would have loved to see more vapor, although I do love how smooth it is. I actually prefer the thinner, smoother vapor at times because I can just “sip” away on the vapor, taking a number of inhalations to extract the chamber, where as other vapes, you’ve reached your desired effect in just a few inhaaltions. Theres no doubt that the Elo is vaporizings your materiasl, it just seems like a much gentler, slower process than some, maybe because it’s more convection than most vaporizers like the Crafty. I don’t understand why 350°F on one vape is complelty different than 350°F on another vaporizer and you would think they should be the same, produce the same vapor, extract your material with the same amount of inhalations but they are rarely cocnstant. Each vaporizer reads and measures temperatures differently, from different areas in the vaporizer and they all heat differently with different sources, different voltages etc. so that can explain a lot.
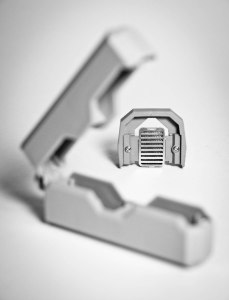 have been happy with the Elo’s vapor production and I really enjoy using this vaporizer.
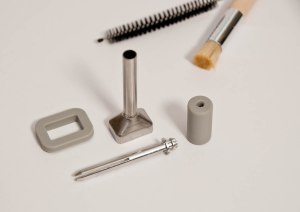

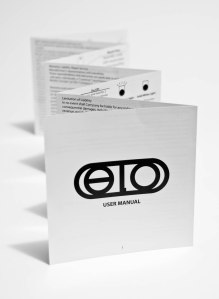 Overall, the Elo is a solid vaporizer. Elo happens to be one of my favorite vaporizers to use because of its design and aesthetics. If there were vaporizers in the 80’s, they’d probably look like the Elo and I mean that in the best way. May not be the smallest or lightest vaporizer out there but its defiantly one of the most unique and unusual. I think the Chip system is great and it really makes vaporizing on the go quick, easy and mess free. Although there are a lot of things I love about Elo, there are a few things I would like to change and probably the biggest thing would be a new design with less Silicone and Less Plastic, as well as a removable battery. Also, I would like to see a more accurate and wider temperature range, a working draw sensor and an actual temperature read-out on the LCD Screen. I would definitely recommend this vaporizer but not to everyone, especially people who may have difficulty with small pieces and people who like thick, cloudy vapor, otherwise Elo is a fun vape that belongs in any serious vipers collection.
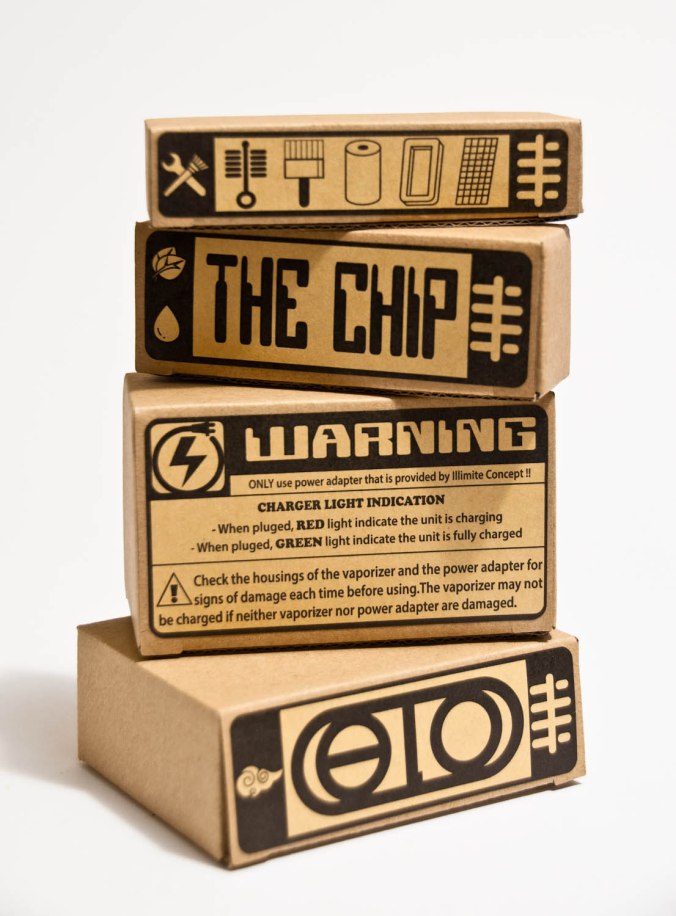
